3 MIN READ
Bathroom
Written By
G2G Team
Published
June 12, 2026
There’s a particular kind of frustration that comes with a small bathroom. You reach for a towel and knock something off the shelf. You step out of the shower and immediately bump into the vanity edge. The room you use more than almost any other in the house somehow feels like an afterthought — squeezed into whatever square footage was left over after the living room got what it wanted.
But here’s what every experienced renovation will eventually show you: small bathrooms aren’t a design problem. They’re a design opportunity. Constraints force precision, and precision produces elegance. Some of the most beautifully finished bathrooms in the world are also among the smallest — Japanese wet rooms wrapped in polished concrete, Parisian pied-à-terre bathrooms gleaming with marble and aged brass, coastal cottages where every tile, hook, and shelf has been placed with intention.
The difference between a cramped bathroom and a composed one isn’t square footage — it’s the quality of decisions made during the remodel. A well-chosen vanity can free up six inches of floor space that makes the room feel twice as large. A single oversized mirror bounces light around a windowless room in a way that changes its entire personality. A frameless glass shower screen erases the visual barrier that makes a tiled shower feel like a closet within a closet.
These 17 small bathroom remodel ideas focus on changes that actually pay off — not just visually, but in how the room functions every single morning. Whether you’re tackling a tight powder room, a narrow ensuite, or a dated main bath, each idea here is practical, achievable, and worth the investment.
The single fastest way to open up a small bathroom is to get the vanity off the floor. A wall-mounted floating cabinet — set in pale oak, matte white, or soft concrete grey — suspends the basin and storage between roughly 14 and 18 inches above the tile, exposing a continuous run of flooring beneath. That unbroken floor line creates a visual sweep from wall to wall, and your brain reads it as substantially more space than is actually there.
The best floating vanities for small bathrooms carry a quiet simplicity: flat-front drawer stacks, no decorative legs, no base panels that interrupt the floor plane. You’re looking for what Scandinavian designers call “visual silence.” A single-door cabinet with two slim drawers typically holds everything a daily routine demands — toothbrushes, skincare, razors, spare products — without the cavernous clutter of a full-depth floor cabinet.
Under the sink, a concealed bottle trap or a slim P-trap cover keeps the plumbing tidy and the under-sink space fully usable. Pair the floating cabinet with a rectangular undermount sink and a flat ledge-mount faucet rather than tall basin-mount taps — this keeps the countertop profile low and the visual field uncluttered. Moisture-resistant MDF with a UV-lacquered finish holds up well in humid conditions, and if the budget allows, a Sintered Stone or Dekton countertop in a pale veined finish delivers a luxury feel without the maintenance demands of real marble.
Practical note: Measure your existing plumbing rough-in height before ordering — floating vanities require the drain and supply lines at a specific height, and if adjustment is needed, factor in plumber time before finalizing your choice.
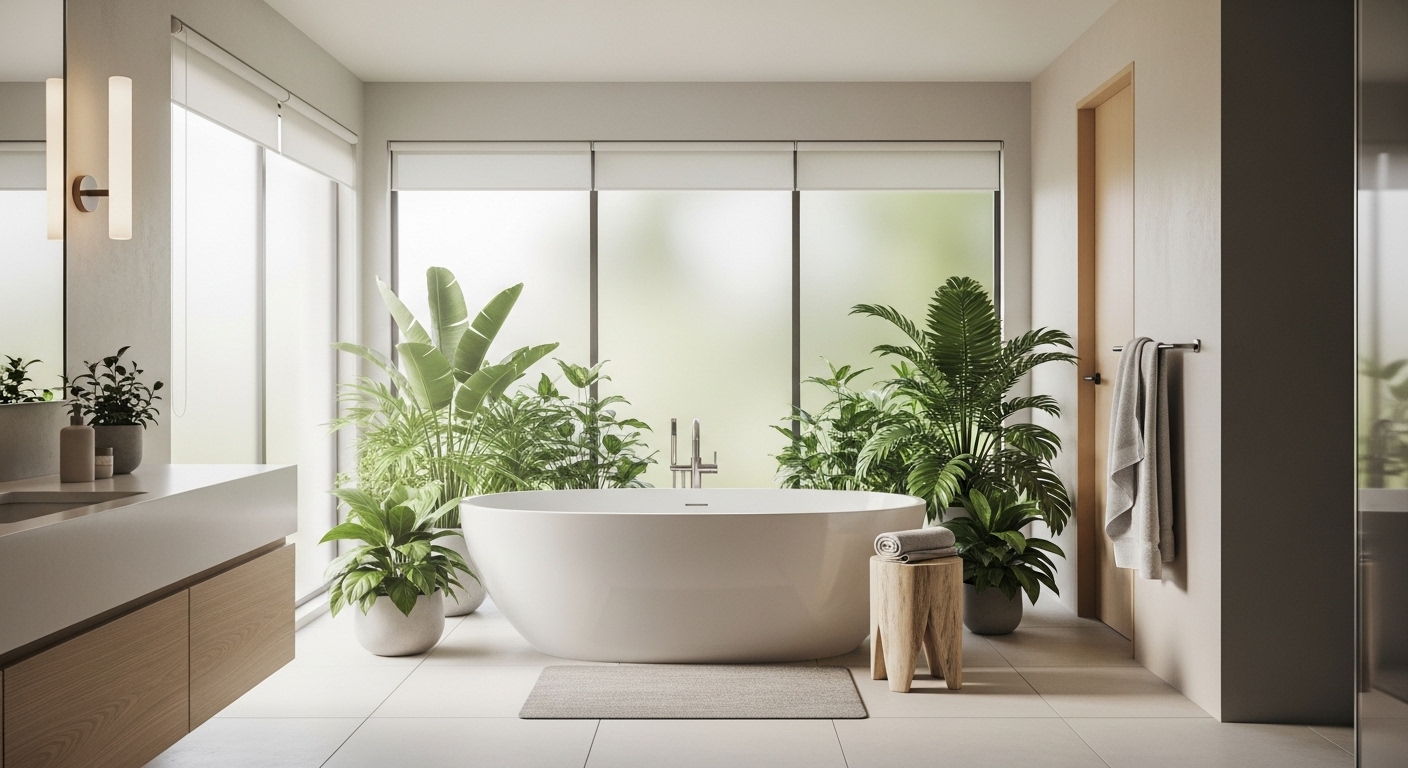
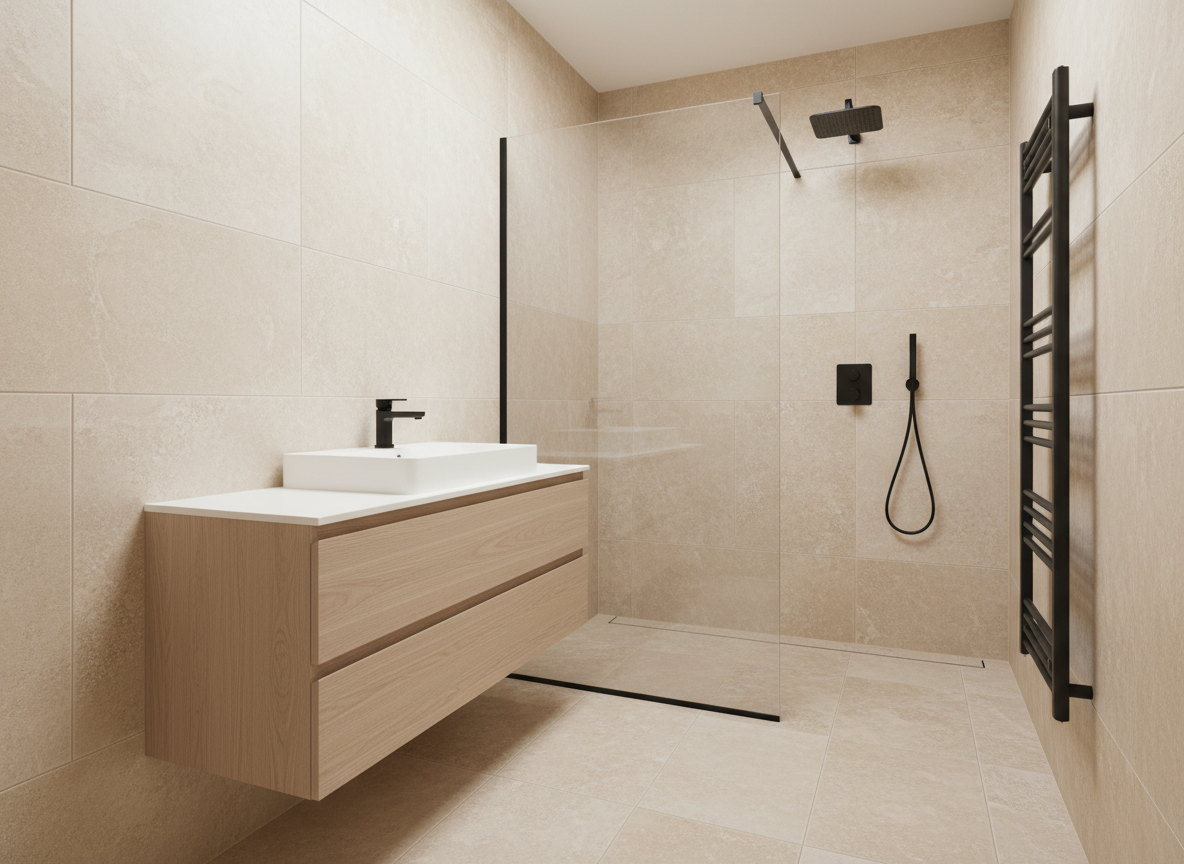
If your small bathroom still contains a bathtub that gets real soaks once a week but rushed showers the other six mornings, the tub-to-shower conversion is the most impactful square footage reclaim available to you. A standard alcove tub claims roughly 13 to 14 square feet of floor. A well-designed walk-in shower — especially one with a frameless glass enclosure and a curbless entry — can occupy just 9 to 10 square feet while feeling dramatically more open than the old tub ever did.
The transformative detail is eliminating the curb. A zero-threshold entry means the floor tile runs continuously from the main bathroom into the shower base without any step-over or raised lip. The eye reads this as a single seamless surface, which expands the room considerably. A 12×24-inch porcelain tile in a warm limestone tone, laid in a classic brick pattern across both zones, reinforces that continuity.
Frameless glass panels — 3/8-inch tempered clear — form the enclosure without cutting the room in half. Mount them in a thin floor channel with no upper rail, keeping the visual plane open. A ceiling-flush rainfall showerhead completes the minimal profile. The linear drain, running along the back wall rather than a center-floor position, allows the tile to pitch subtly in one direction, which is both cleaner to install and easier on the eye than a tile pattern interrupted by a central point drain.
In a small bathroom, grout lines are visual noise. Every joint between tiles is a break — a hard edge the eye registers, then moves on, then registers again, and again. Multiply that across a standard 5×8 bathroom floor tiled in 4×4-inch ceramic squares and you have hundreds of grid intersections demanding attention. The room feels busy before a single fixture is in place.
Large-format tiles — 24×24 or 24×48 inches — cut the grout-line count so dramatically that the floor reads as a near-continuous surface. With a 24×24 tile on a standard bathroom floor, you may have as few as 12 to 15 individual tiles and almost no visible grid. The ideal choice is a rectified large-format porcelain in a warm greige, pale limestone, or soft taupe. “Rectified” means the edges have been machine-cut to precise right angles, allowing joints as thin as 1/16 of an inch when installed by a skilled tiler.
On the walls, a 48×24-inch tile installed horizontally in a stacked vertical pattern adds clean horizontal banding that makes the room feel wider. Large-format wall tiles are especially effective in the shower enclosure, where a single tile can span the full height of the surround with just one grout line across the whole panel.
Practical note: Large-format tiles require a perfectly level subfloor — any undulation greater than 1/8 inch over 10 feet causes corners to lift or crack over time. Self-leveling compound before tiling is always worth the investment.
A shower curtain does its job reliably — it keeps water where it belongs. But in a small bathroom, every time you draw it, you lose something: a wall of opaque fabric divides your already compact room in two, and the eye stops at that barrier. The moment of closure is also a moment of visual compression.
A frameless glass screen is almost invisible by comparison. Whether it’s a single fixed panel, a hinged door, or a pivot screen, tempered glass allows sight lines to carry uninterrupted from the bathroom entrance all the way to the far wall. When the shower is not in use, the room reads as whole rather than halved.
For a small bathroom, the most functional configuration is a fixed glass panel at the showerhead end of the tub or shower zone, angled slightly toward the wall, combined with a short return panel that prevents splash without requiring a full door. This open-entry approach works particularly well when the toilet and vanity are positioned outside the direct spray zone — and it sidesteps the maintenance of hinges and door seals entirely. Glass specification: 3/8-inch tempered clear with a flat polished edge. Anti-limescale coating — products like Diamon-Fusion or EnduroShield — is worth the modest upcharge in hard-water areas, cutting cleaning time by more than half.
Color does something remarkable in a small room: it can either push the walls outward or draw them inward, entirely based on tone, warmth, and finish. Deep charcoals and saturated teals can look stunning in larger bathrooms but create an effect of compression in tight quarters. Light, warm-neutral tones do the opposite. They absorb very little light, reflect it generously, and give the room a soft, open quality that reads as spacious.
The emphasis on “warm” matters here. Cool whites — anything with a blue, grey, or lavender undertone — can tip into clinical in a confined bathroom, making the space feel more like a utility room than a retreat. Warm whites with yellow or pink undertones read as welcoming and considered: Benjamin Moore White Dove, Farrow & Ball Pointing, and Sherwin-Williams Alabaster are consistently reliable choices for bathrooms that need both brightness and warmth.
For a minimalist approach that still feels calm and deliberate, take a look at our minimalist bathroom ideas where neutral palettes and restrained material choices create serenity in compact spaces.
Finish matters as much as color: Matte and eggshell finishes scatter light softly across the wall, concealing minor surface imperfections and avoiding the over-bright look that high-gloss creates in enclosed spaces. Reserve satin or semi-gloss for trim work and cabinetry only, where a subtle sheen emphasizes the edge detail.
Every shampoo bottle, conditioner, face wash, and bar of soap needs a permanent home — and in a small bathroom remodel, that somewhere can’t be a plastic caddy hanging off the showerhead or a tray on the wet floor. Both solutions add visual noise and neither is particularly stable or clean-looking.
A recessed shower niche — carved into the wall during the structural remodel by cutting between two studs — solves daily storage without adding a single millimeter to the bathroom’s footprint. A standard single niche (12 inches wide by 24 inches tall) holds everything most households use daily: tall conditioner bottles, a soap bar, a razor, and a face scrub alongside each other without crowding. A double-stacked niche (12×36 inches) adds comfortable capacity for households with more complex shower routines.
Tile the niche interior to match the surrounding shower wall and use the same grout color throughout — this way it recedes visually rather than drawing attention as a separate, inserted element. If you want a single moment of detail, a contrasting mosaic or an elongated pencil-trim tile on the back wall of the niche reads as intentional and refined.
This approach works especially well in galley-style bathroom layouts where every linear inch of wall is load-bearing for the room’s spatial logic. Position: Center the niche at approximately 48 inches from the floor — comfortable reach for most adults. Always use a waterproof membrane board (Schluter Kerdi, USG Durock) and a well-sloped niche floor before tiling.
The standard floor-mounted toilet is dependable, but its footprint is fixed and its visible form — broad ceramic base, exposed supply line, curved body anchored to the floor — is among the most visually dominant elements in a small bathroom. It announces itself. A wall-hung toilet, mounted to an in-wall carrier frame with the cistern concealed entirely behind a flush panel, lifts the fixture off the floor and removes that visual anchor.
The result is a bathroom floor that reads as completely open beneath the toilet — the same visual logic as the floating vanity. Both create unbroken tile runs across the floor, and both give the eye that expansive sweep from wall to wall that makes compact rooms feel composed rather than cramped. In a small ensuite or half-bath, this can be the decisive visual difference.
The flush panel — a slim rectangular push-plate in brushed nickel, matte black, or white — sits flush to the wall tile surface. The only visible evidence of the toilet mechanism is this minimal tile-matching plate, which doubles as a design feature rather than a maintenance port. Wall-hung toilets can also be set at a custom height — the carrier frame allows heights up to 19 or 20 inches, which many adults find significantly more comfortable for daily use.
Practical note: The carrier frame adds 6 to 8 inches of wall depth and requires reinforced framing — plan this as part of a full remodel. Geberit and TECE make widely available frames compatible with most ceramic pan manufacturers.
Light and reflection are among the most cost-effective tools in bathroom design. A full-height mirror — running from a countertop ledge all the way to the ceiling, or from baseboard to ceiling on the wall directly opposite the shower — doubles the room’s perceived depth. It creates the convincing impression that the bathroom continues beyond the surface of the wall.
The most effective configuration for a small bathroom is not a single framed vanity mirror centered above the sink, but a continuous mirror panel that spans the full width and height of the available wall. This eliminates the visual “top” of the mirror and allows light from windows, LED fixtures, and pale surfaces to bounce back across the room from multiple angles simultaneously. The room reads as infinite in one direction.
For a contemporary finish, mount a frameless mirror panel — bevelled or straight-edged — directly to the wall using mirror adhesive and a few discreet J-clips at the base. For a warmer, more curated look, a series of slightly staggered antique-silver or unlacquered brass framed mirrors can achieve a collected, considered effect without the clinical perfection of a single continuous sheet.
Design reasoning: Position the mirror so that its reflection catches the room’s main light source — a window opposite, or a vanity sconce at eye level. That reflected light source bounces back into the room and dramatically brightens zones that would otherwise be in shadow.
In a small bathroom, a basic towel bar on the back of a door stores a towel but nothing more. It doesn’t heat the space, it doesn’t warm the textiles, and it contributes a thin horizontal strip of chrome hardware to yet another surface. A heated towel rail — particularly a vertical ladder-style radiator — consolidates three functions into one: room heating, towel warming, and a vertical design accent.
Vertical ladder rails run tall and narrow, typically between 180mm and 250mm wide and 800mm to 1200mm tall. That profile occupies a fraction of the wall width that a panel radiator would require, making it ideal for the slim vertical wall sections common in small bathrooms — beside the shower, flanking the door, or on the wall opposite the vanity. In matte black powder-coated steel or brushed stainless, a heated towel rail has a warm, almost furniture-like presence against pale neutral tile. It also has the practical advantage of hiding water spots that polished chrome perpetually reveals.
For a relaxed, spa-like bathroom atmosphere — the kind explored in our spa bathroom ideas — a heated towel rail is one of the sensory details that elevates the daily ritual from functional to something worth looking forward to.
Installation tip: An electric heated towel rail — hardwired and set on a timer — is often simpler than adding a plumbed connection to your hot water system. Set it to activate 30 minutes before your morning shower so warm towels are ready when you step out.
A standard inward-swinging bathroom door claims a sweep arc of roughly 12 to 14 square feet when it opens — a significant portion of a small bathroom’s total floor area. That arc governs where everything else is allowed to be: the vanity can’t sit within the swing path, the toilet can’t crowd the hinge side, and there’s often a brief, awkward shuffle required to close the door behind you once you’re inside.
A pocket door, which slides into the wall cavity, eliminates the arc entirely. Every square foot that the door swing previously commanded is returned to use — you can position the vanity closer to the entry wall, rearrange the toilet to a more comfortable angle, or simply let the room breathe. The wall on either side of the pocket door cavity can hold a mirror or a towel hook that a swinging door would have blocked.
If the wall cavity contains plumbing or wiring that makes pocket door installation impractical, an external sliding barn-style door achieves a similar benefit. The track and panel mount flat against the wall face, requiring clear wall space beside the opening rather than inside the room — still a meaningful gain over the swing arc. Glass-panel pocket doors — frosted, clear, or reeded — are worth considering if the bathroom has no window, as they allow natural light to travel from adjacent spaces without sacrificing privacy.
The space beneath a bathroom sink is chronically underused in most homes — a dark, deep cabinet where cleaning products, spare toilet rolls, and half-empty bottles accumulate in layers that nobody wants to excavate. In a small bathroom, this storage is too valuable to waste. Every inch of concealed storage that actually works reduces the pressure on counter surfaces and open shelving.
The most functional solution is a pair of slim pull-out drawer inserts, mounted on soft-close ball-bearing slides inside the vanity base cabinet. A 24-inch-wide cabinet typically accommodates two 10-inch pull-out drawers side by side, each deep enough for upright product bottles, folded face cloths, and small accessories. Pull-outs are categorically more useful than a fixed shelf: you see everything in the drawer at a glance, and you can access items at the back without removing what’s in front.
Custom cabinetry handles this correctly as a matter of course. For a more accessible approach, Hafele and Rev-A-Shelf both produce retrofit pull-out organizer inserts that fit inside most standard vanity base cabinets, requiring only a screwdriver and a few hours to install. The cost is modest — typically $40 to $80 per insert — and the functional improvement is immediate.
Design note: Matching the interior drawer finish to the exterior of the vanity — white-painted drawer boxes inside a white vanity — creates a seamless look that reads as thoughtful and designed rather than improvised.
Half-wall tiling — the ceramic equivalent of traditional wainscoting, running from the floor to roughly 48 to 54 inches in height — is a technique that earns its place in small bathrooms for reasons that go beyond aesthetics. It protects the most water-exposed portion of the wall more durably than paint. It introduces a defined horizontal line that gives the room a sense of considered proportion. And it provides a change of material at eye level that adds depth to what would otherwise be a single-surface box.
The most versatile choice is a 3×6-inch or 4×8-inch glazed ceramic subway tile, laid in a classic brick-offset pattern. The scale is generous enough to feel substantial without competing with large-format floor tiles, and the glaze introduces a soft reflective quality that bounces light in a small room without the harshness of full-gloss. Above the tile line, a matte wall paint in a slightly deeper warm neutral tone creates a two-zone wall that feels considered rather than accidental.
The cap — a thin bull-nose, pencil-trim, or rounded-edge tile that finishes the top edge of the tiled zone — is a small but significant detail. A clean cap communicates craft and signals that the design was intentional to that precise point rather than stopping because someone ran out of tile.
Grout color strategy: White tile with white grout creates the most seamless, airy effect. White tile with pale grey grout creates a graphic but restrained grid. In both cases, a grout sealer applied within the first few months protects against staining for years.
The hardware in a bathroom — faucets, shower valve trim, towel bars, robe hooks, toilet flush plate, cabinet pulls — is the equivalent of jewelry on an outfit: each piece is individually small, but taken together they define whether the room feels finished or merely functional. In most small bathrooms built in the last 20 years, the default is polished chrome: affordable, available everywhere, and neutral in the safest possible sense of the word.
Swapping everything to a consistent matte black or brushed brass changes the room’s personality at relatively low cost. Matte black brings a precise, graphic modernity — its non-reflective surface holds a clean look throughout the day without the constant fingerprints and water spots that polished chrome accumulates. Against pale neutral tile and white sanitaryware, matte black reads as confident and deliberate. Brushed unlacquered brass carries a warmer, more artisanal quality — at its best, it evokes a well-travelled European hotel bathroom where things are aged and purposeful rather than perfectly pristine.
The rule is unwavering consistency: every piece of visible metal hardware must share the same finish. One polished chrome towel bar in a matte black scheme signals an oversight, not a design decision. A complete fixture swap — new faucet, shower valve trim, towel hardware, robe hooks — can typically be completed in a weekend and costs $300 to $500 for the full set in mid-market finishes.
Most ceramic tiles are installed horizontally — it’s the default orientation for subway tiles and large-format panels alike, and in most bathrooms it works without friction. But in a small bathroom with a low or standard-height ceiling, a deliberate vertical tile run can add optical height without changing a single structural element of the room.
Standard 3×6-inch subway tiles, laid with their long dimension running vertically rather than horizontally, create a series of upward-pointing lines that direct the eye toward the ceiling. On the shower wall facing the bathroom entry — the first surface you see when you open the door — this effect is especially pronounced. The ceiling reads as taller than it measures. For an even stronger vertical emphasis, an elongated plank-format tile — 2×10, 3×12, or the increasingly popular 3×24 — amplifies the upward direction by virtue of its proportions.
According to research cited by the American Society of Interior Designers, vertical line emphasis is one of the most reliable tools for creating perceived height in compact residential spaces — a principle that holds across rooms from kitchens to bathrooms to narrow entryways. This technique works especially effectively in combination with a pale wall color: the vertical lines do the spatial work, and the light wall tone ensures the eye isn’t distracted by surface contrast.
A single overhead light fixture is the most common bathroom lighting mistake, and it’s disproportionately punishing in small spaces. A single downlight directly above the vanity casts shadows downward across the face — the worst possible arrangement for a mirror you use every morning. The rest of the room sits at a flat, undifferentiated brightness that gives the whole space an institutional quality.
Layered lighting — three distinct sources each serving a different purpose — transforms a small bathroom in a way that no material change quite matches. The first layer is ambient overhead lighting: a recessed downlight positioned near the center of the ceiling for general room illumination. The second, and most important, layer is vanity task lighting: horizontal LED bars or sconces mounted at eye level on either side of the mirror. Side-mounted vanity lighting eliminates facial shadows entirely and is the standard in professional makeup and grooming environments for good reason.
The third layer is accent lighting: a low-intensity LED strip under the floating vanity, inside the recessed shower niche, or behind a backlit mirror panel. Alone, it’s subtle — but in a small room, it adds dimensionality and warmth to evening use that transforms the bathroom from a functional space into an atmospheric one.
Color temperature: 2700–3000K (warm white) for ambient and accent fixtures. 3000–3500K for vanity task lighting where accurate color rendering matters most for applying makeup or checking skin.
Every surface in a small bathroom has one job: don’t accumulate clutter. The moment the counter around the sink begins filling up with skincare bottles, cotton pad containers, and the electric toothbrush that doesn’t fit in the under-sink cabinet, the room starts to feel smaller than it is — visually and psychologically.
An illuminated medicine cabinet — either surface-mount or recessed into the wall between studs — solves the mirror, the vanity lighting, and the daily-use storage in a single flush-mounted unit. The best models combine a large reflective front panel with an LED perimeter light (typically warm-white at 3000K), adjustable interior shelving, and soft-close hinges. Many include a built-in USB outlet inside the cabinet for charging electric toothbrushes or grooming tools — a practical detail that eliminates a cord from the countertop.
Recessed installation requires cutting between studs — entirely feasible in standard wood-stud construction, but not possible in concrete block or masonry walls without more significant work. Surface-mount models project just 3 to 4 inches from the wall surface, which is shallow enough to read as cabinetry rather than as a protrusion once the mirror face is flush with the surrounding surface. The leading mid-range options — Kohler Verdera, Robern AC series — offer generous interior dimensions in a 24-inch or 30-inch width, accommodating full-size product bottles and accessories without compression.
Design note: A medicine cabinet eliminates the separate mirror and the separate vanity light. In a small bathroom where every fixture occupies precious wall real estate, that consolidation matters.
A small bathroom that has been beautifully tiled, carefully lit, and fitted with quality fixtures can still carry a cold or clinical quality if it lacks material warmth. Tile is hard. Glass is smooth. Grout is grey. Together, they make a room that functions perfectly but doesn’t invite you to linger. Natural textures — wood, fiber, linen, woven grass — are the counterbalance that shifts a bathroom from sterile to sensory.
Teak is the traditional choice for wet-environment wood because of what’s already inside the timber. Its naturally high silica and oil content gives it a baseline resistance to moisture, dimensional movement, and mold growth that most other species can’t match without chemical treatment. The look is warm — a honey-to-chestnut grain that reads beautifully against cool stone or pale grey tile. A slatted teak bath mat (typically 24×16 inches, raised slightly above the floor on low feet) brings immediate organic warmth to the tile zone just outside the shower.
Woven linen — a hand towel draped over a wall rail, a small basket beside the door for dirty laundry, a fabric soap dish or pump cover — adds softness and tactile depth. Choose undyed or naturally-dyed linen in sand, biscuit, or warm terracotta tones. The result is a bathroom that feels collected and warm: hard tile, soft linen, smooth glass, and oiled wood together create a sensory layering that a single material cannot achieve alone.
Design reasoning: Tactile contrast is what makes a room feel finished. When every surface in a space belongs to the same material family — all hard, all smooth, all cool — the room feels unresolved. One layer of natural organic material corrects that balance entirely.
Small bathrooms have a way of surprising you when you commit to them fully. Once the floating vanity is in and the pocket door has replaced the arc-stealing swing door, once warm-toned tile runs unbroken from the shower floor to the far wall and the heated towel rail has replaced that aging chrome bar, the bathroom you used to rush through becomes one you want to linger in.
Start with the change that addresses your biggest daily frustration. If storage is the problem, the illuminated medicine cabinet and pull-out under-sink drawers will give you the most immediate relief. If the room feels dark and closed-in, layered lighting and a full-height mirror will transform it faster than any retiling project. If the layout simply doesn’t work — the door swing is an obstacle, the tub is never used — then the structural changes like the pocket door and tub-to-shower conversion are worth planning for properly.
Pick one idea from these small bathroom remodel ideas, plan it carefully, source it thoughtfully, and let it set the standard for everything that follows. Your small bathroom doesn’t need more square footage. It needs better decisions.
G2G Team
06-12-2026
Let’s Build
Contact us todayGet daily tips and tricks for making your best home.
2025 Green to Gorgeous