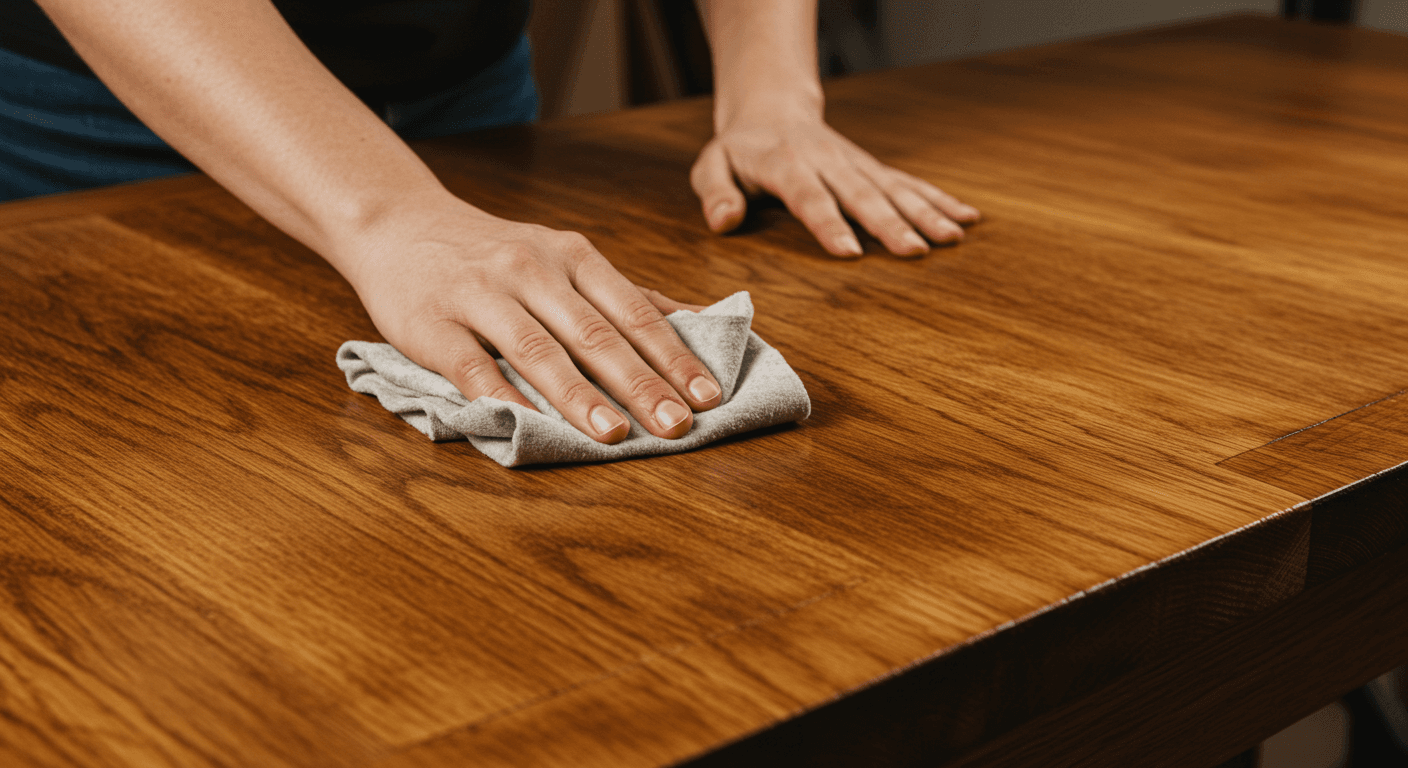
Imagine transforming your wooden surfaces into stunning works of art or sleek, polished finishes with just a simple step—using mineral spirits. These versatile solvents are trusted by DIY enthusiasts and professional woodworkers alike for their ability to clean, prep, and refine wood surfaces effortlessly.
In this article, you’ll discover a range of creative ideas and practical techniques to achieve smooth, flawless finishes using mineral spirits. Whether you’re going for rustic charm or a modern, polished look, these ideas will inspire you to experiment and elevate your woodworking projects.
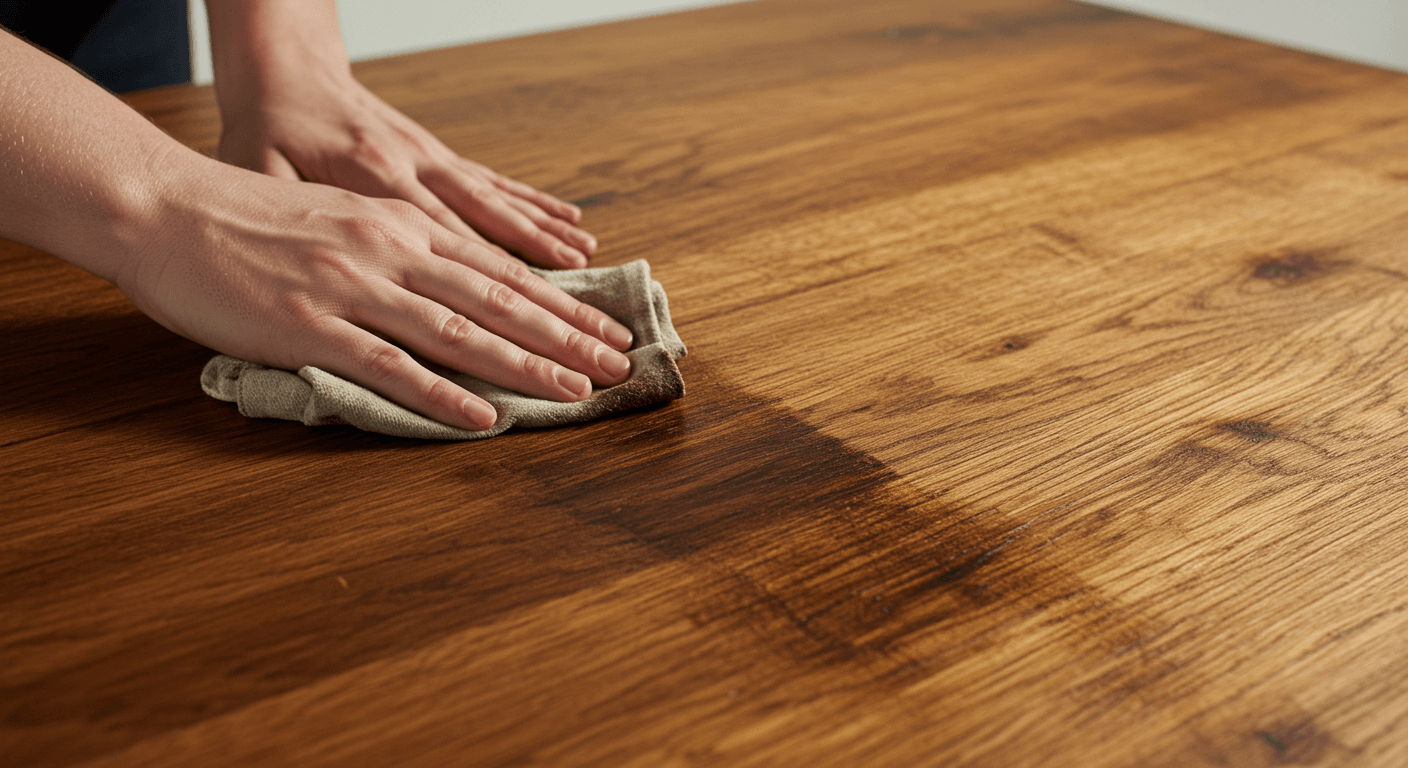
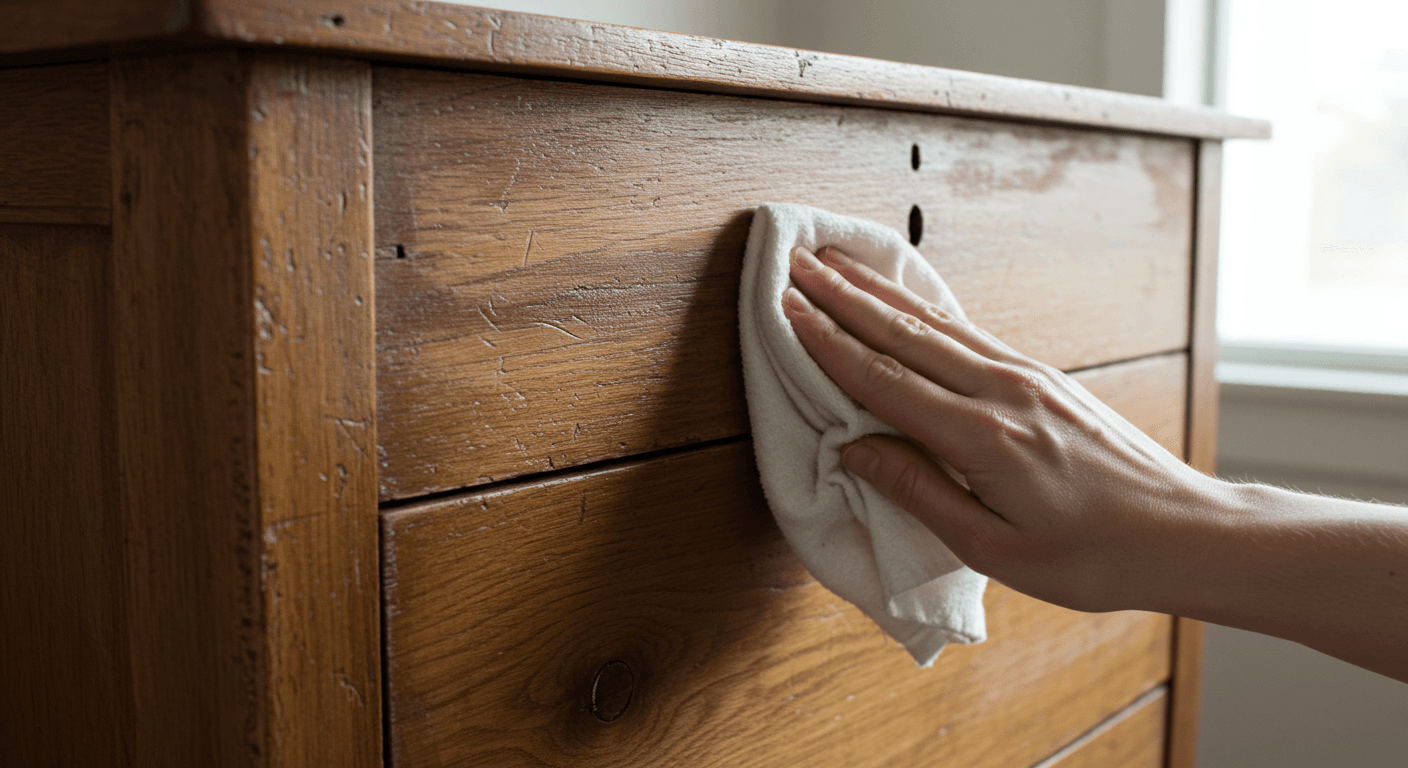
Ever wanted to give old wooden furniture a new life without losing its vintage appeal? Achieving an antique finish can seem difficult, especially when blending stains and finishes. Mineral spirits can help create that perfect weathered look with a soft, timeworn glow.Picture a weathered oak table with rich hues and softened grain. A light stain, gently wiped with mineral spirits, creates a matte aged appearance with depth and character. The contrast between darker and lighter sections makes the piece look authentically vintage.
This method works beautifully on pine, oak, or mahogany. For more distress, apply a darker stain and lighten edges using mineral spirits. Warm undertones work best for cozy interiors, while cooler tones suit modern spaces. Apply stain evenly, let it rest, and use a cloth dampened with mineral spirits to wipe away excess. Focus on edges and corners for natural wear effects. Light misting helps blend streaks smoothly. Always test first on scrap wood before starting your main piece.
Layering stains or adding pigments before wiping gives each project a unique identity. Add carved or decorative elements for extra vintage appeal. Finish with a soft buff for a subtle glow or leave it matte for authenticity.

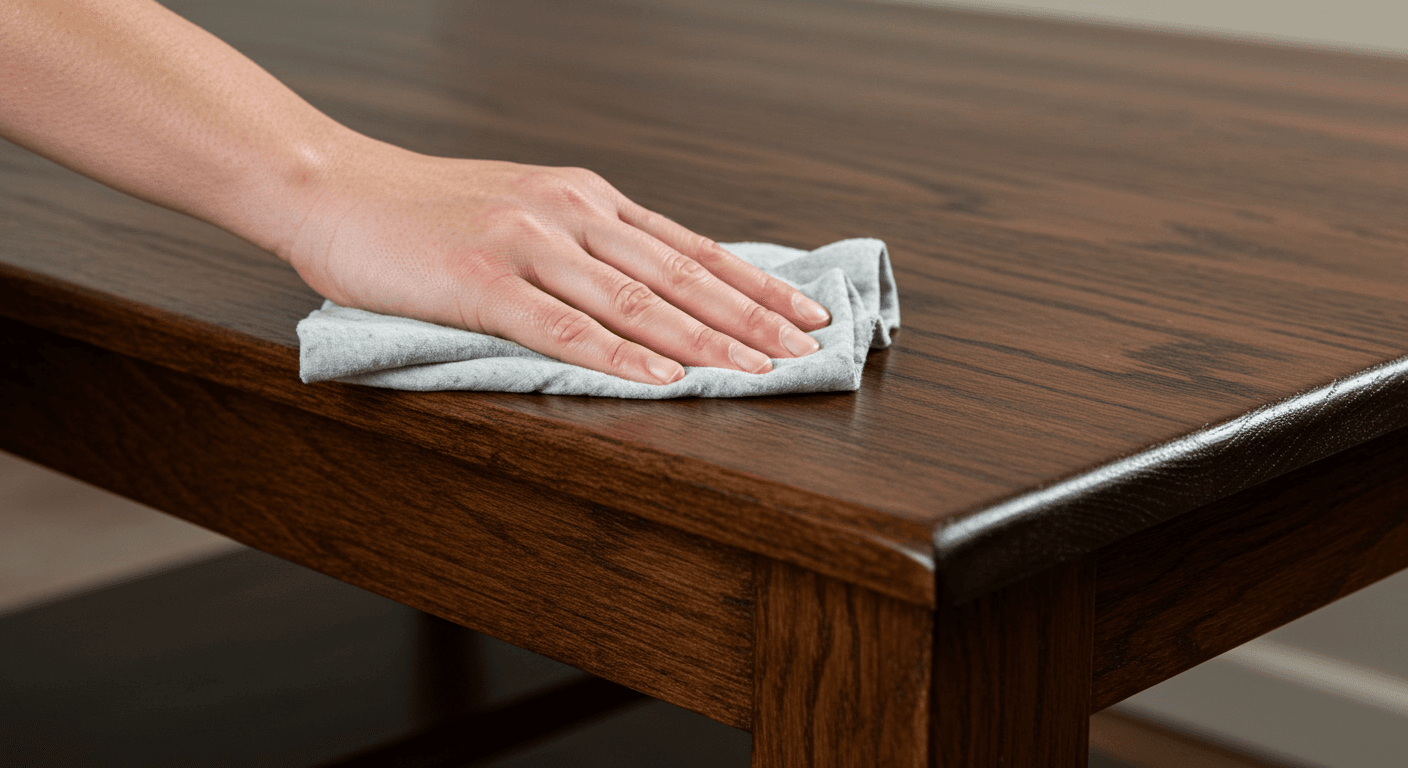
A satin finish strikes the perfect balance between matte and glossy—smooth, modern, and practical. Mineral spirits make it easy to achieve that refined sheen without visible brush marks.
Imagine a dining table glowing softly under natural light, its surface sleek and touchable. The wood’s grain remains visible but gently muted, giving it an elegant and welcoming vibe.
For lighter woods like maple, use thin coats to maintain brightness. For darker woods like walnut, deepen the tone with richer layers. Adjust hues seasonally for warmth or coolness.
Sand smoothly, wipe with mineral spirits, and apply a thin finish layer using a foam pad or soft brush. Sand lightly between coats to remove marks. A final wipe with spirits smooths everything out to a silky finish.
Personalize with edge detailing, tinted topcoats, or inlays. Choose the sheen—matte, satin, or semi-gloss—to suit your style. Regular care keeps it pristine for years.

Mixing different wood tones can easily look mismatched. Mineral spirits help unify varying shades into a smooth, cohesive finish.
Picture a reclaimed wood coffee table with hues of honey, walnut, and chestnut melting together into harmony. The transitions look natural and intentional, not patchy.
Apply stains to each section, let them rest briefly, and blend boundaries using mineral spirits on a rag. Wipe back and forth gently until transitions disappear. For softer results, mist spirits across the surface before finishing.
Add layered color gradients or soft highlights for depth. Finish with a clear coat to preserve the blend. With patience and precision, you’ll create furniture that looks naturally balanced and expertly crafted.
![]()
If you want to highlight wood’s natural grain without altering its tone, mineral spirits are essential. They help clean and open the grain before applying sealant, ensuring clarity and even absorption.
Visualize an oak side table where each grain line glows softly beneath a satin seal. The wood looks alive, detailed, and silky smooth.
After sanding, wipe with mineral spirits to clear debris and prepare the surface. Apply a clear sealant in thin coats, sanding lightly between each layer. Wipe with spirits at the end to reveal the pure texture of the wood.
Add a subtle tint if desired—warm amber for coziness or cool blue for a modern feel. The result is timeless craftsmanship that celebrates the beauty of natural wood.
Refinishing starts with proper prep, and mineral spirits are your best ally. They remove grime, wax, and old finishes, ensuring your new coating adheres perfectly.
Imagine a dusty vintage dresser transformed after a thorough mineral spirit wipe. The old varnish softens, carvings stand out, and the surface feels fresh again.
Remove hardware, wipe with mineral spirits, and let it sit briefly before wiping again. Sand lightly for an even base, then finish with your chosen stain or paint.
This method saves time, reduces sanding effort, and ensures a flawless final look. With clean prep, every finish turns out smoother and more durable.
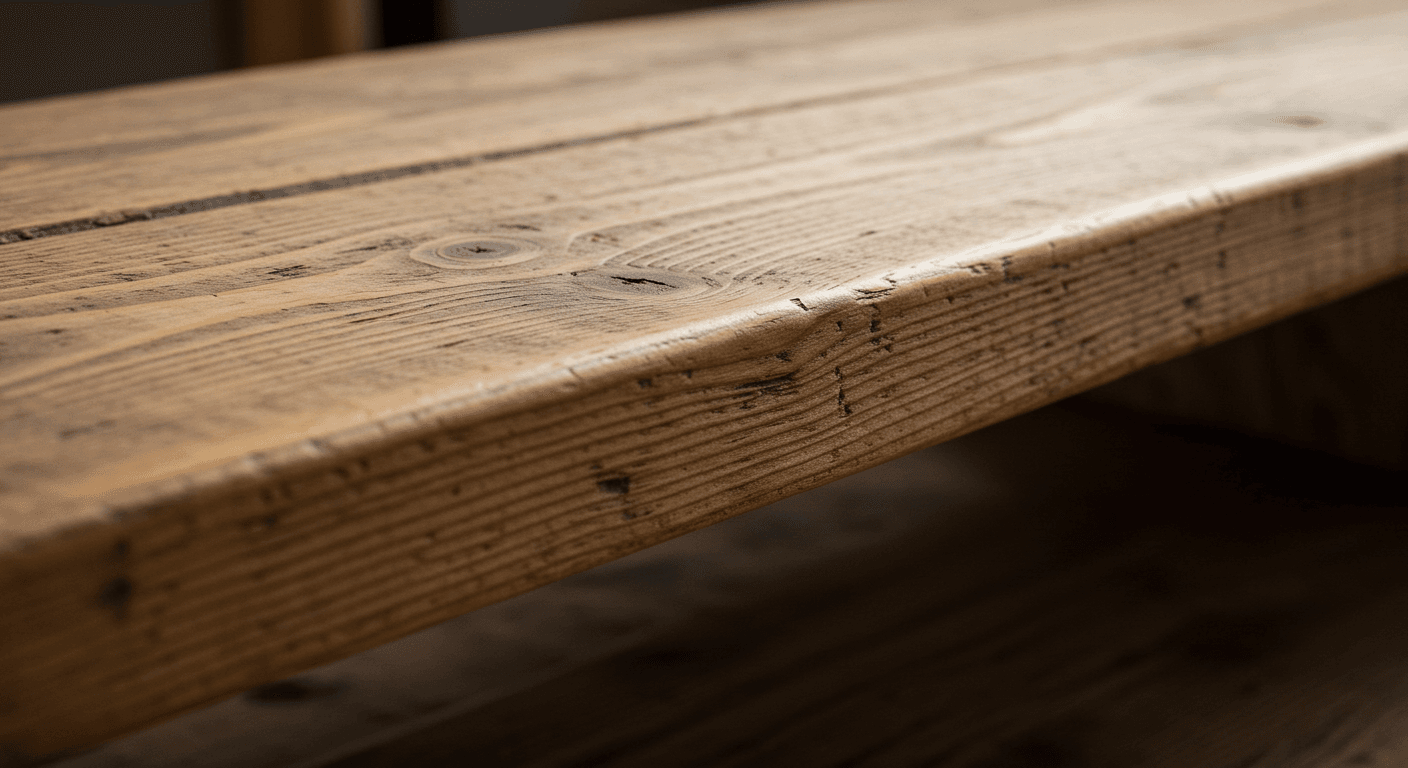
To make grain details pop without overpowering them, a light mineral spirits wash works wonders. It enhances contrast subtly, letting natural beauty shine through.
Picture a rustic pine shelf where every swirl and knot comes alive. A gentle spirit wipe deepens patterns and reveals texture, making even simple wood look luxurious.
Use on raw or lightly finished surfaces. Wipe evenly with mineral spirits along the grain. For more contrast, add a light dye before wiping. Finish with a clear coat for protection.
This technique adds character to any furniture or accent piece, making the wood itself the star.

A sleek modern bench should feel as smooth as it looks. Mineral spirits help remove fine dust, reveal grain texture, and prep surfaces for a flawless finish.
Imagine a minimalist bench with a mirror-like wooden top, perfectly even to the touch. After each sanding step, a mineral spirit wipe clears residue and smooths pores for that seamless feel.
Combine fine-grit sanding with spirits for the best results. Finish with a light protective coat to preserve the surface. The outcome: smooth, refined furniture ready for any interior.
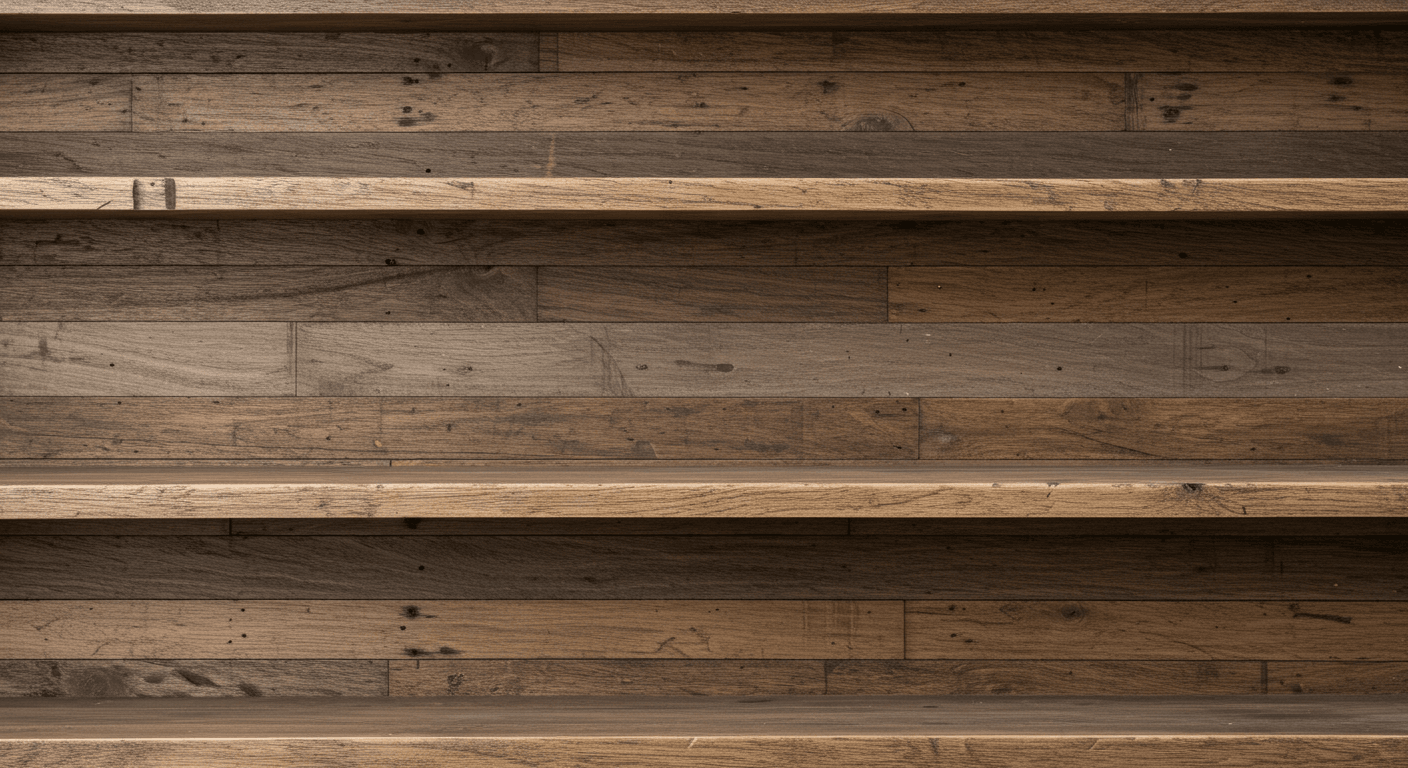
When working with mixed reclaimed wood, consistency can be hard to achieve. Mineral spirits blend varied tones and soften harsh contrasts beautifully.
Visualize shelves with planks of differing shades now harmonized into one vintage-inspired masterpiece. Spirits melt, transition, and enhance texture without losing authenticity.
Gently wipe edges, corners, and joints with mineral spirits to balance tones. Finish with a matte seal for an aged look. This easy method gives reclaimed wood a refined, timeless appeal.
Too much gloss can make wood look artificial. Mineral spirits help tone down shiny finishes for a natural matte appearance.
Picture a glossy table dulled to perfection—grain visible, texture soft, and light beautifully diffused.
Wait until the finish is half-cured, then wipe gently with mineral spirits in circular motions. Buff lightly for an even matte tone.
The result is an elegant, understated surface that feels premium and organic. A subtle adjustment that transforms your project’s entire vibe.
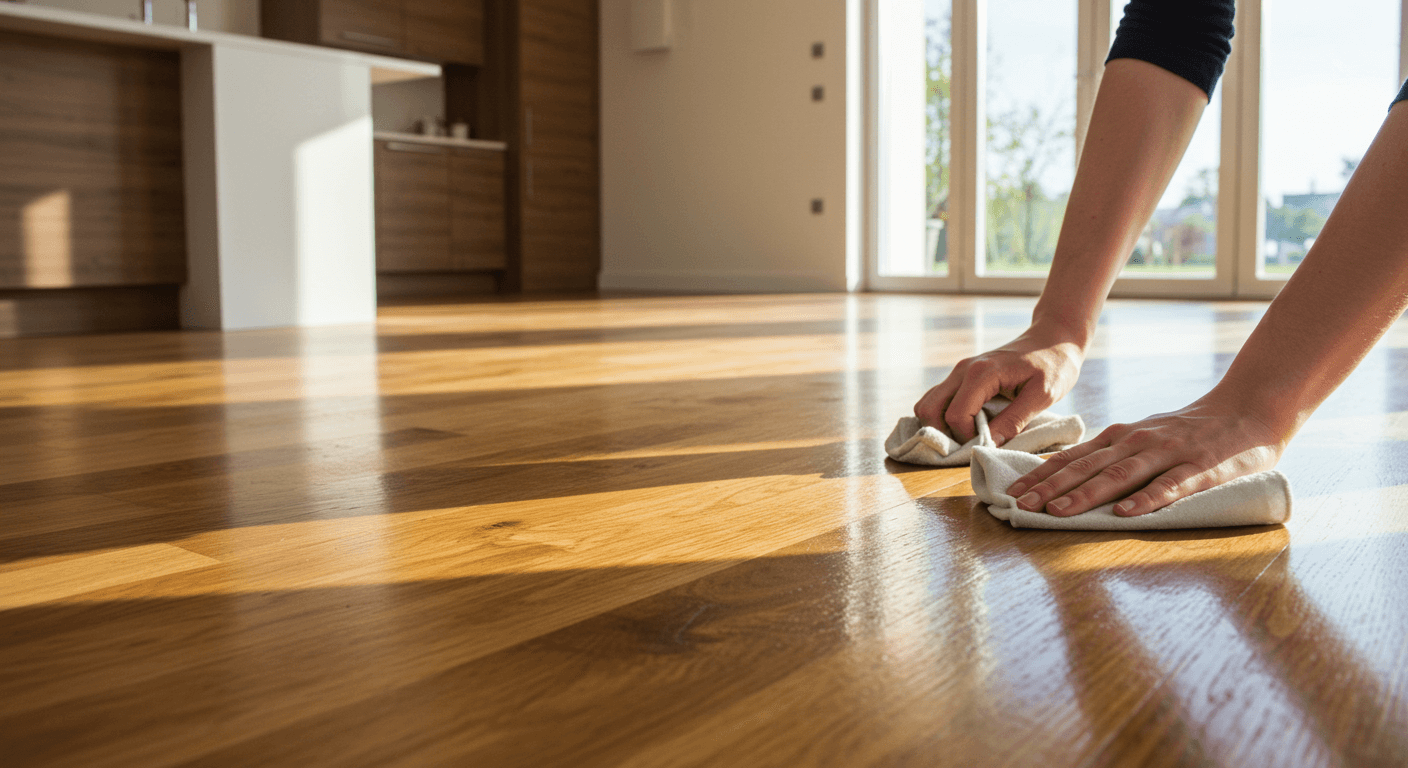
Want your hardwood floors to gleam like they were just installed? Achieving a uniform, glossy surface can be challenging, especially when previous coats are uneven or streaky. Many DIYers struggle with blotchy finishes that ruin the sleek look. Mineral spirits can help smooth out those imperfections and produce a mirror-like shine.
Picture a luxurious open-concept living room with gleaming oak floors. After applying a high-gloss finish, you notice streaks and uneven patches. A few gentle wipes with mineral spirits and fine sanding make the surface uniformly shiny, revealing the wood’s natural beauty. The result is a flawless, reflective surface that enhances the entire space, making it feel expansive and elegant.
This technique works on different wood types and finish systems—oil-based polyurethanes, water-based finishes, or epoxy coatings. For outdoor decks, choose spirits that won’t weaken UV-protective layers. Seasonal climate influences drying and curing times. Adjust the level of gloss by controlling the thickness and number of coats—more coats for a deeper shine, fewer for a subtler gloss.
Start by thoroughly sanding the floor with fine-grit grit to ensure a smooth base. Apply the finish evenly, then wait until the coat is partially cured but still tacky. Dampen a cloth with mineral spirits and gently wipe the surface in long, smooth strokes to remove inconsistencies. Use a buffer or burnishing pad for an extra glossy effect if desired. Finish with a final light wipe to refine the shine.
Incorporate decorative inlays or contrasting stains in small sections to add visual interest before sealing. Experiment with different sheen levels—semi-gloss for a softer look or high-gloss for maximum reflectivity. Regular cleaning with gentle products maintains the glossy finish. Protective pads under furniture prevent scratches and preserve the shine.
A glossy floor elevates your entire space, offering an upscale feel with minimal effort. Once mastered, this technique allows you to maintain a showroom-quality finish for years. It’s empowering to see how a few simple steps can transform your home’s look and feel. Your floors will thank you for the extra care—you’re capable of achieving stunning results.

Kitchen cabinets take a beating—splashes, grease, and fingerprints—and often look tired after years of use. Refinishing them to a smooth, durable finish can seem daunting, especially with tight spaces and stubborn grime. Mineral spirits are essential for cleaning and prepping, ensuring your new finish sticks and lasts.
Imagine opening aged, grimy cabinets that once looked dull and chipped. Wiping them down with mineral spirits reveals fresh, clean wood with a rich, natural grain. After applying a smooth coat of paint or stain, the cabinets gleam with a sleek, uniform surface. The transformation is dramatic, bringing a fresh, modern vibe to your kitchen.
This process suits both painted and stained finishes, with adjustments for different materials—pine, oak, or MDF. For a more rustic look, lightly distress the surface after applying spirits. Seasonal factors like humidity influence drying times and adhesion—more humid climates may require longer curing. Incorporate different hardware or decorative accents to personalize your refreshed cabinets.
Begin by removing hardware and thoroughly cleaning the surface with mineral spirits, paying attention to grease and grime. Sand lightly to smooth out imperfections. Use spirits again to clean off dust and residual finish. Apply your chosen paint or stain in thin, even coats, allowing each to dry fully. Finish with an extra layer of spirits or a clear protective coat for a smooth, durable surface.
Personalize your cabinets with custom paint colors, contrasting trims, or decorative panels. Add unique hardware or soft-close hinges for a modern touch. Incorporate decorative moldings or glass inserts to elevate the design. Regular maintenance with spirits and gentle cleaning keeps the finish looking fresh and new.
Refinishing cabinets is a rewarding project that instantly upgrades your kitchen. It’s satisfying to see old, tired surfaces transformed into sleek, functional art. Once you get the hang of this process, future touch-ups or refinishing become straightforward. Your kitchen will become a space you’re proud of—ready for years of use.
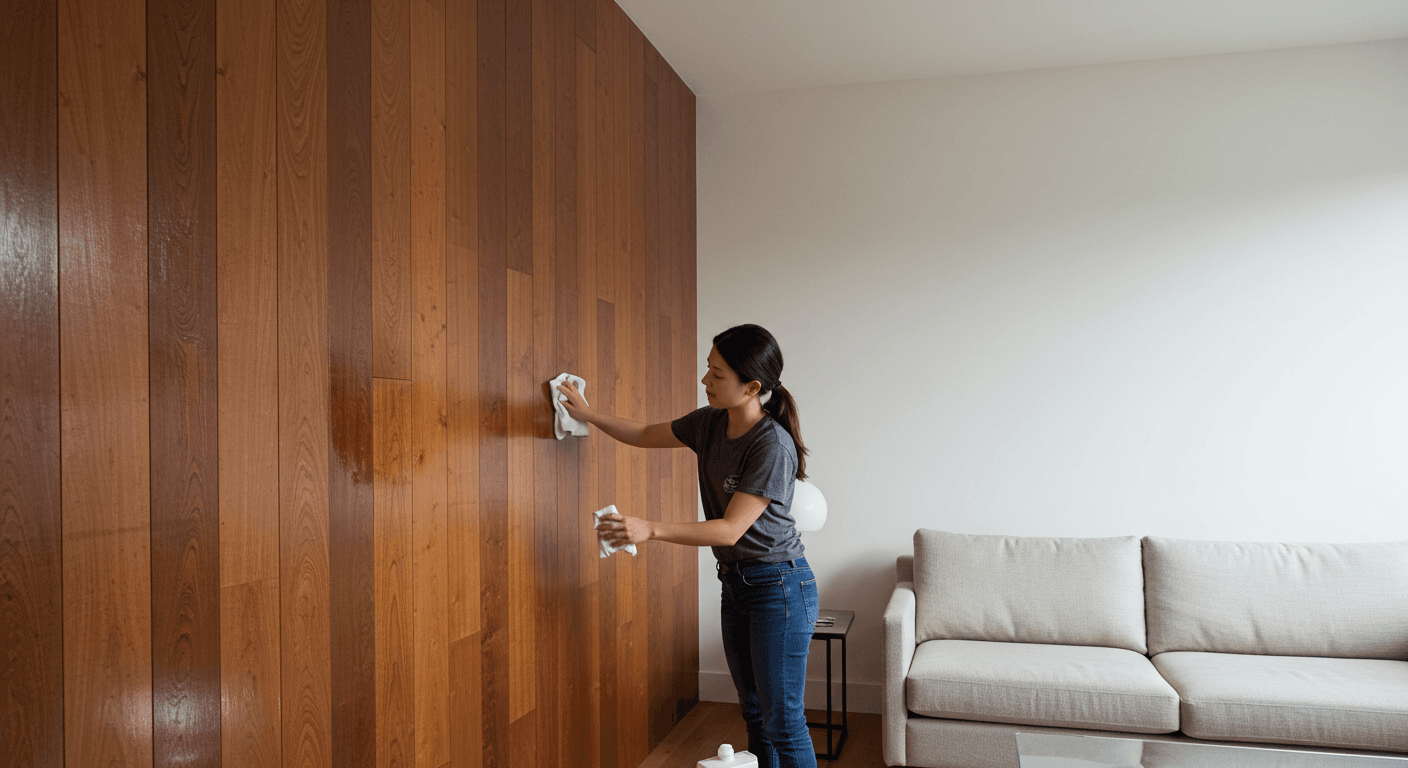
Dreaming of a sleek, minimalist wall that feels warm and inviting? Wooden paneling can easily look rough or unfinished, ruining that clean aesthetic. Smoothing and sealing the surface creates a polished, modern backdrop. Using mineral spirits simplifies the process, helping you achieve a seamless, sophisticated finish.
Visualize a room with vertical wood panels that once looked rustic and uneven. After wiping them with mineral spirits, the surface feels instantly smoother and more uniform. The wood’s natural grain is subtly enhanced, giving the space a refined texture. The finish is matte or satin, blending effortlessly with minimalist decor and allowing other design elements to shine.
Adjust your approach based on the panel type—wide planks or narrow slats. For a more textured look, lightly sand after spirits, or for a sleek surface, skip sanding altogether. Seasonal tweaks include adding subtle stains for warmth or cool tones. Incorporate decorative molding or painted accents to add personal flair within a minimalist framework.
Start by cleaning the paneling thoroughly, removing dust and grease. Use mineral spirits on a clean cloth to wipe down the surface, removing any residue or old finish. Lightly sand if needed, then wipe again with spirits. Apply a sealant—preferably matte or satin—to lock in the smoothness and enhance the natural beauty. Use a brush or roller for even coverage, working in the direction of the grain.
Add subtle color washes or tinted sealants for warmth or contrast. Incorporate decorative elements like minimalist trim or geometric patterns painted on the panels. For durability, choose sealants suited for high-traffic areas. Regular touch-ups with spirits help maintain the smooth, modern look over time.
Smooth, sealed wooden wall panels create a stunning minimalist backdrop that elevates any space. It’s a simple upgrade that feels sophisticated and timeless. Once you master this technique, updating other surfaces becomes effortless. Your home’s style will feel cohesive, clean, and inviting—you’ve got this.

Rustic wood countertops add charm but often come with rough surfaces and uneven edges. If you want that sleek, modern look without losing the warmth of wood, smoothing and sealing are crucial. Achieving that smooth, refined finish can be tricky without the right tools. Mineral spirits can help you get there, making your rustic piece look polished and contemporary.
Imagine a reclaimed barn wood countertop with rough edges and splinters. After wiping with mineral spirits, the surface feels silky, and the wood’s natural grain is brought to life. The irregularities are softened, but the rustic character remains, giving a perfect blend of modern smoothness and vintage charm. The finished surface invites both visual and tactile appreciation.
This approach suits various wood types, from thick slabs to thinner veneer overlays. For a more industrial look, leave some textured areas intentionally, then blend the rest for contrast. Seasonal adjustments include adding a tinted sealant for warmth in colder months or a clear coat for summer freshness. Edging details can be rounded or beveled for extra refinement.
Start by sanding the surface with coarse grit, then progressively move to finer grits. Wipe down thoroughly with mineral spirits to remove dust and open the grain. Use spirits to clean and prepare the surface for sealing; a light coat of sealant or oil is then applied in thin layers. Buff with a soft cloth after each coat to achieve a smooth, even finish. Sealants with UV protection are recommended for outdoor or sunlit areas.
Enhance the rustic-modern hybrid by adding subtle inlays or contrasting edges. Incorporate decorative metal brackets or embedded lighting for a sleek look. For a personal touch, stain the edges or carve custom patterns before sealing. Regular maintenance with spirits and gentle cleaning preserves the finish and keeps the wood looking fresh.
Transforming rustic wood into a sleek countertop combines beauty with function. It’s empowering to see how simple techniques can elevate natural materials into modern statement pieces. With practice, refinishing rustic wood becomes an accessible craft that adds value and style. Your space will feel warm, inviting, and uniquely yours—you’re capable of creating stunning results.
Looking to upgrade your wooden bed frame with a luxurious, velvety finish? A soft, matte surface adds comfort and elegance, making your bedroom feel like a retreat. Achieving that plush, velvety touch without a heavy coating is a challenge—unless you know the right technique. Mineral spirits can help you smooth and prepare the surface for a silky finish.
Imagine running your hand over a freshly refinished bed frame where the surface feels buttery and smooth. The grain’s natural patterns are subtly highlighted, but the overall feel is velvety rather than glossy. The finish absorbs light softly, creating a calming, inviting atmosphere. The transformation makes the entire bedroom look more refined and cozy.
This approach works on various wood types, from soft pine to dense hardwoods. For a more tactile finish, incorporate textured topcoats or matte sealants. Seasonal changes—like adding warm hues for winter or lighter shades for summer—are easy with tinted spirits or stains. Combining this technique with decorative carvings or inlays personalizes your bed frame further.
Begin by sanding the bed frame to a smooth, even surface. Use mineral spirits to clean off dust and residual finish. Apply a thin layer of matte or velvet-like sealant with a sponge or brush, working with the grain. Wait for it to dry, then lightly sand with fine grit for extra smoothness. Repeat as necessary to build a plush, velvety surface. Finish with a final wipe of spirits to remove any excess.
Personalize further by adding a subtle tint or color wash that complements your bedroom decor. Incorporate decorative elements like carved details or textured headboards to enhance the plush feel. Use soft, textured bedding and throws to match the finish, creating a cohesive, luxurious look. Regular gentle cleaning preserves that velvety softness.
A velvety finish turns your bed into a statement of comfort and style. It’s surprisingly simple to achieve with the right techniques, boosting your confidence in refinishing furniture. Once you master this, you can easily refresh other pieces to create a cozy, elegant space. Your bedroom will feel more inviting—you’ve got the skills to make it happen.
AI Image Prompt: vintage wooden side table being lightly distressed with mineral spirits and sandpaper, revealing softened edges and a worn-in patina
Craving that charming, worn-in look on your furniture but worried about overdoing it? A subtle distressed effect adds character without looking battered. The challenge lies in controlling the aging process to look intentional and tasteful. Mineral spirits combined with light sanding can help you achieve that perfect balance.
Picture a vintage side table with gently worn edges and soft, uneven color. Using spirits, you soften the finish, revealing glimpses of the underlying wood or previous layers. Light sanding emphasizes the worn effect, especially around corners and edges. The result is a piece that radiates history and personality, but with a refined touch. It’s like giving your furniture a gentle, well-loved patina.
This technique suits various styles—Shabby Chic, rustic, or coastal. For more dramatic effects, apply a darker stain first, then wipe away or sand down areas selectively. Seasonal tweaks include adding light or dark washes to match your decor mood. Combining with decorative hardware or painted accents personalizes the look even further.
Start with a clean, sanded surface. Apply a stain or paint if desired, then use mineral spirits on a rag to lightly distress the surface—working along the grain and focusing on edges. Use fine sandpaper or a sanding sponge to gently remove paint or stain from high-wear areas. Seal with a matte or low-sheen topcoat for durability. Reapply spirits between coats for a more authentic aged appearance.
Add decorative elements like fabric or leather accents for a layered look. Incorporate carved or textured details to enhance the aged effect. Use contrasting colors or metallic highlights for a unique touch. Regular maintenance with spirits and light sanding keeps the distressed look fresh and charming.
Achieving a subtle distressed effect lends your furniture a timeless appeal. It’s a technique that combines creativity with control, making each piece uniquely yours. As you refine your skills, you’ll find endless ways to add charm and character to your home. Embrace the imperfect beauty—you’re capable of creating stunning vintage-inspired pieces.
AI Image Prompt: stained wooden panel being wiped with mineral spirits to deepen color and reveal intricate grain, under gallery lighting
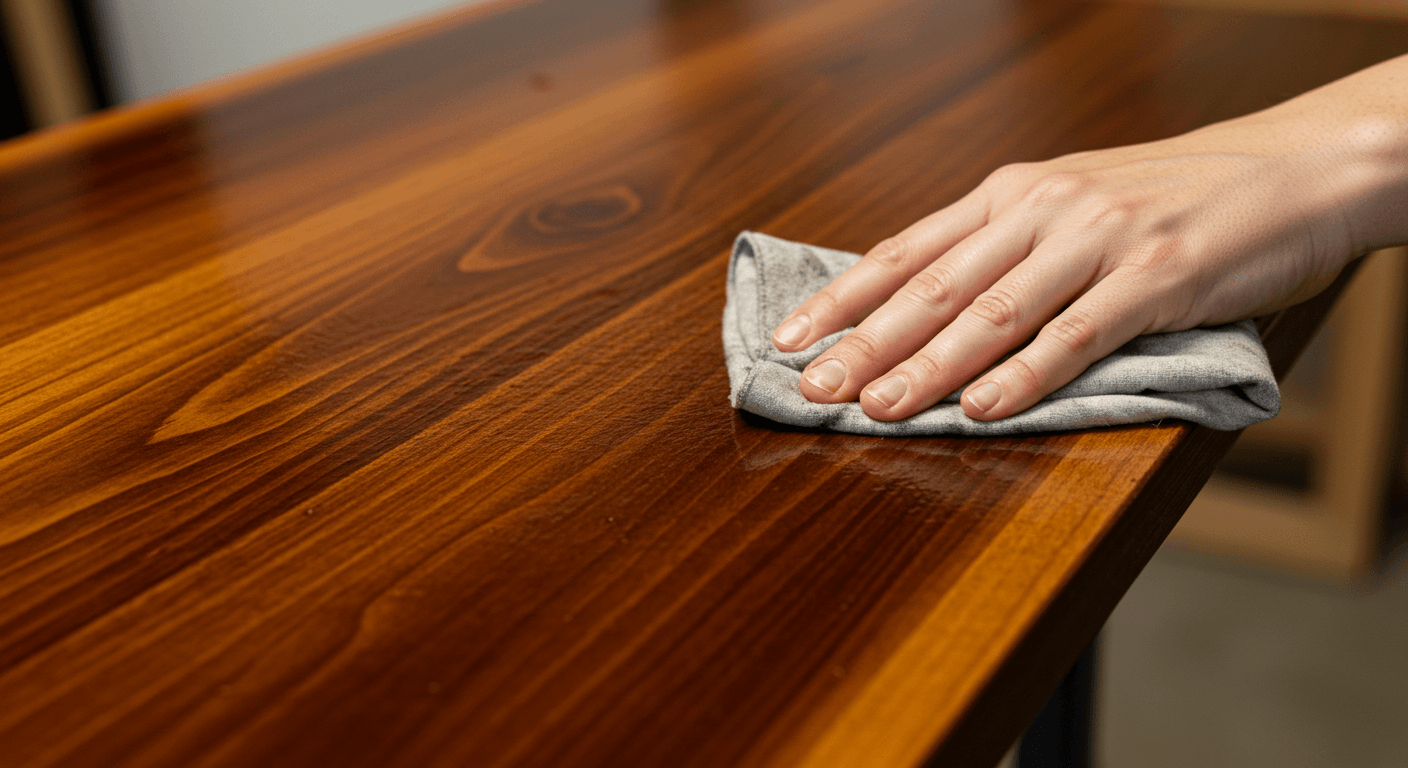
Want your stained wooden art pieces to pop with richer, deeper colors? Overly light or flat finishes can make artwork look dull or lifeless. Enhancing color depth without overpowering the original stain is a delicate art. Mineral spirits can help you deepen and enrich hues, giving your art a vibrant, gallery-worthy finish.
Imagine a handcrafted wooden panel with a soft, translucent stain. Wiping it with mineral spirits intensifies the color, revealing complex undertones and subtle variations. The surface feels smooth and velvety, inviting close inspection. The result is a piece that radiates depth and richness, transforming a simple art project into a captivating focal point.
Adjust your approach based on the type of stain—oil, water, or gel. For a subtle boost, dilute spirits and apply in light, controlled wipes. For more dramatic depth, layer multiple applications, allowing each to cure before adding the next. Seasonal considerations include warmer temperatures enhancing the spirits’ penetration. This technique works well on panels, sculptures, or decorative plaques.
Start by applying your chosen stain and letting it dry thoroughly. Use spirits on a clean cloth to wipe away excess, focusing on areas you want to deepen. Work in long, even strokes, blending edges seamlessly. For added richness, reapply spirits after the initial wipe, building layers gradually. Finish with a protective sealant suited to your desired sheen—matte or glossy. The key is patience and controlled application.
Layer with tinted spirits or metallic powders for unique effects. Incorporate decorative carving or inlay work to complement the enhanced color. Use contrasting frames or mounts to highlight the richness of the finish. Regular touch-ups with spirits ensure your art maintains its vibrant depth over time. Experimentation unleashes your creative potential.
Deepening color in stained wood elevates your artwork from simple to stunning. It’s a simple technique that adds complexity and allure, making your pieces stand out. Mastering this skill boosts your confidence in working with stains and spirits alike. Soon, your home will be filled with art that’s as rich in color as it is in meaning—you’re capable of creating masterpieces.
AI Image Prompt: outdoor wooden bench being wiped with mineral spirits and sealed, showing smooth surface and subtle sheen under natural sunlight
Outdoor furniture faces the elements—rain, sun, and dirt—making durability and appearance a constant concern. Achieving a smooth, sealed finish that lasts for years is a challenge many DIYers shy away from. Mineral spirits can help prep the surface and improve the adhesion of protective coatings. Want your patio set to look great and stand the test of time?
Picture a weathered wooden bench with faded, rough patches. After a thorough wipe with mineral spirits and light sanding, the surface feels refreshed and even. Applying a high-quality outdoor sealant creates a protective, smooth coating that enhances the natural grain. The surface now glows with a subtle sheen, inviting relaxation and outdoor gatherings. The transformation proves that proper prep makes all the difference.
This process suits different wood types—cedar, teak, or composite materials—each requiring tailored sealants. For high-traffic or exposed areas, opt for sealants with UV and waterproofing properties. Seasonal updates include adding stain or tint in winter to add warmth, or clear coats in summer for maximum protection. Adjust sanding and spirits’ application based on the initial surface condition.
Start by cleaning and removing any old finish or dirt. Lightly sand to smooth out rough patches and open the grain. Wipe down with mineral spirits to remove dust and residual oils. Apply a weatherproof sealant with a brush or spray, working in thin layers for even coverage. Use spirits to wipe after each coat for a smooth, uniform finish. Allow adequate curing time in dry, moderate conditions.
Add a tint or stain before sealing for a richer color, especially in darker hues. Incorporate textured elements like carved borders or decorative inlays to elevate the design. Use contrasting or metallic accents to personalize the look further. Regular maintenance with spirits and gentle cleaning preserves the finish and keeps your outdoor furniture looking elegant.
Sealing and smoothing outdoor furniture extends its life and beauty, making your investment worthwhile. It’s gratifying to see a once-weathered piece turn into a stylish, durable feature of your yard. With this technique, you gain confidence in tackling outdoor projects and creating lasting beauty. Your outdoor space will look stunning year-round—you’ve got this.
Let’s Build
Contact us todayGet daily tips and tricks for making your best home.
2025 Green to Gorgeous