There’s something deeply satisfying about watching a paver project come together. From the first shovelful of soil to the last stone set in place, the process of laying pavers like a pro transforms a bare patch of ground into a polished, functional, and long-lasting hardscape. Whether you’re designing a patio, walkway, or driveway, paver installation combines both art and engineering.
Done properly, a paver hardscape not only looks incredible but also stands the test of time, resisting shifting, sinking, and cracking. In this guide, we’ll walk you through the professional process of installing pavers, highlighting tools, steps, and pro tips to ensure flawless results.
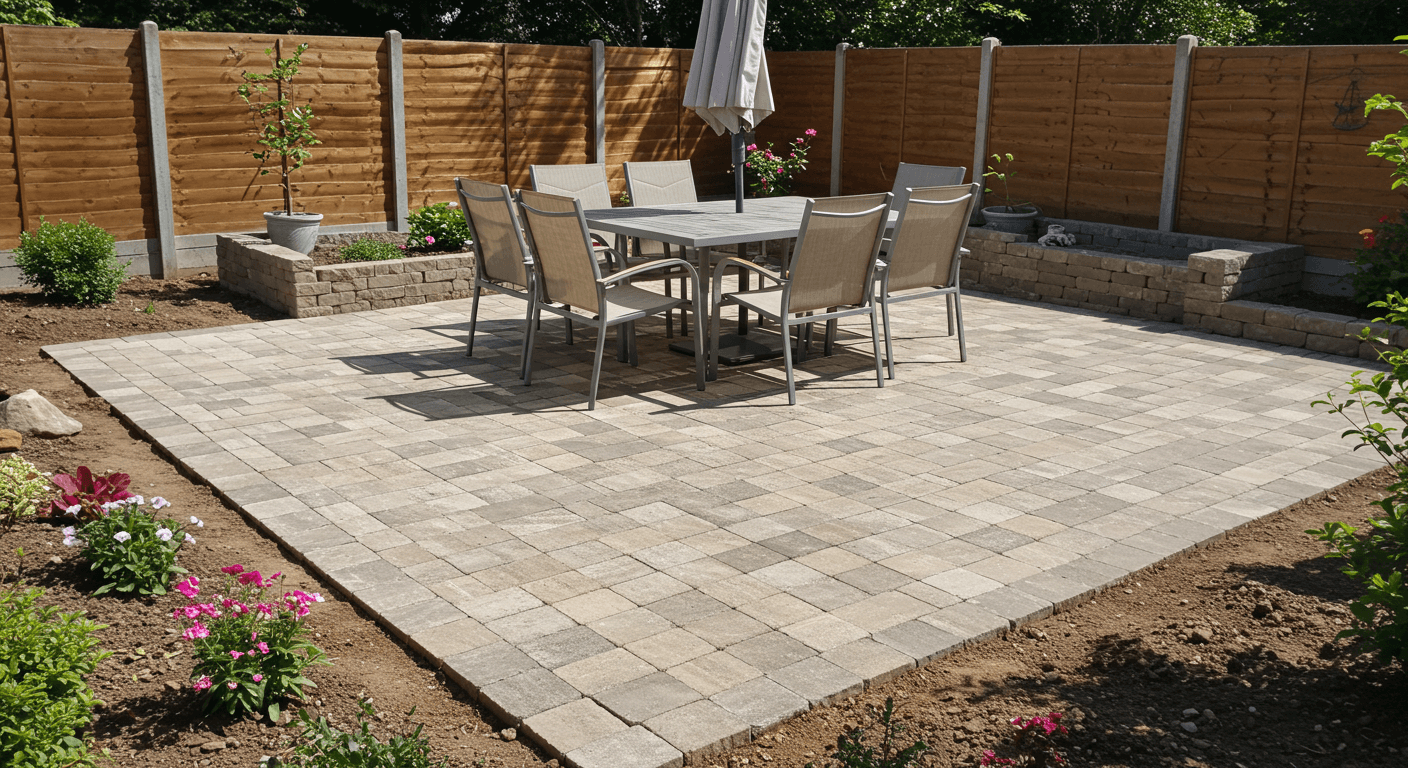
Pavers are one of the most versatile hardscape materials available. Unlike poured concrete or asphalt, they offer a timeless, modular design that can be customized to fit any outdoor vision.
Benefits of paver installation include:
👉 For custom patio and walkway installations, Green to Gorgeous provides professional paver design and installation services.

Like any successful project, the right preparation makes all the difference.
💡 Pro Tip: Always order 5–10% more pavers than the area requires to account for cuts and breakage.
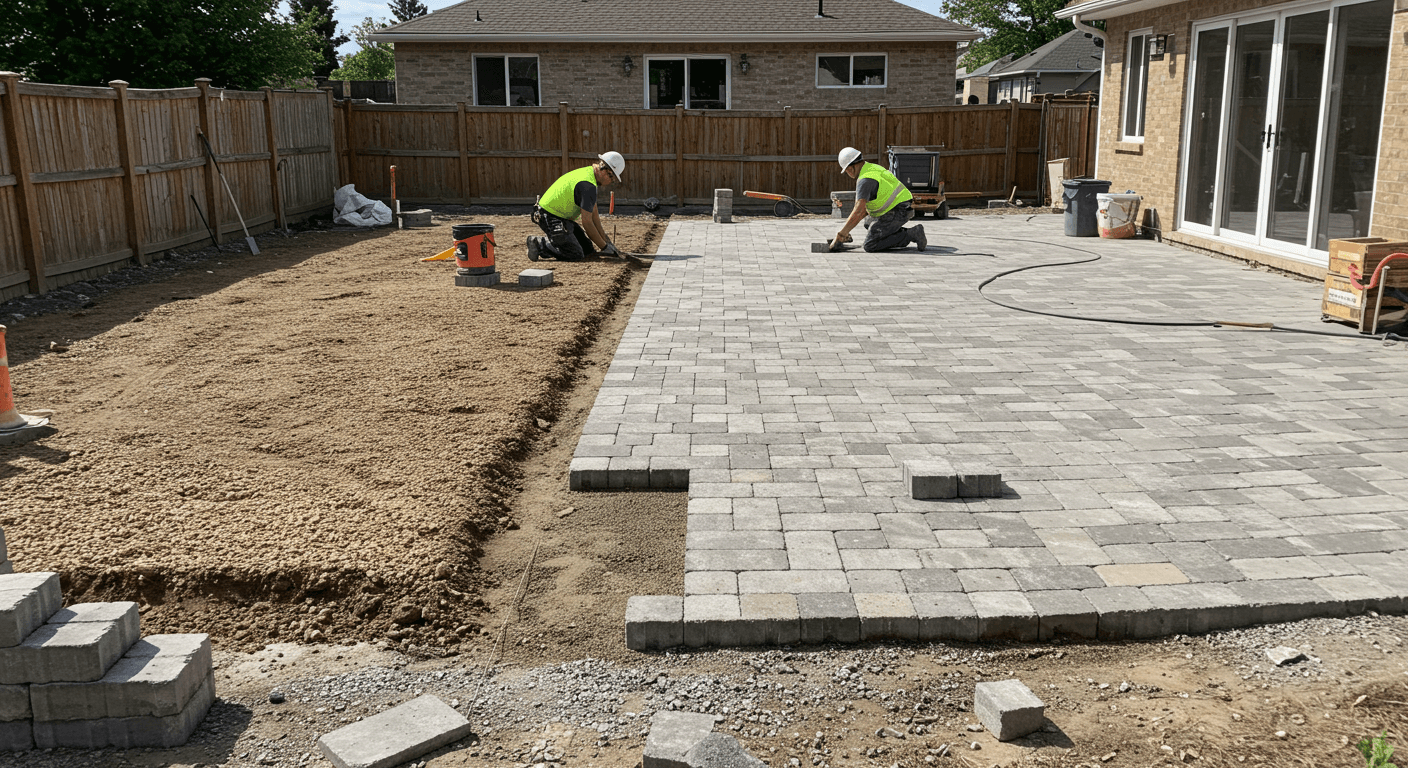
Start with a clear design. Decide on the pattern (herringbone, basket weave, running bond, etc.) and mark out the area with stakes and string.
Dig down to the proper depth—usually 6–8 inches for walkways and 10–12 inches for driveways. This allows enough room for the base material and pavers.
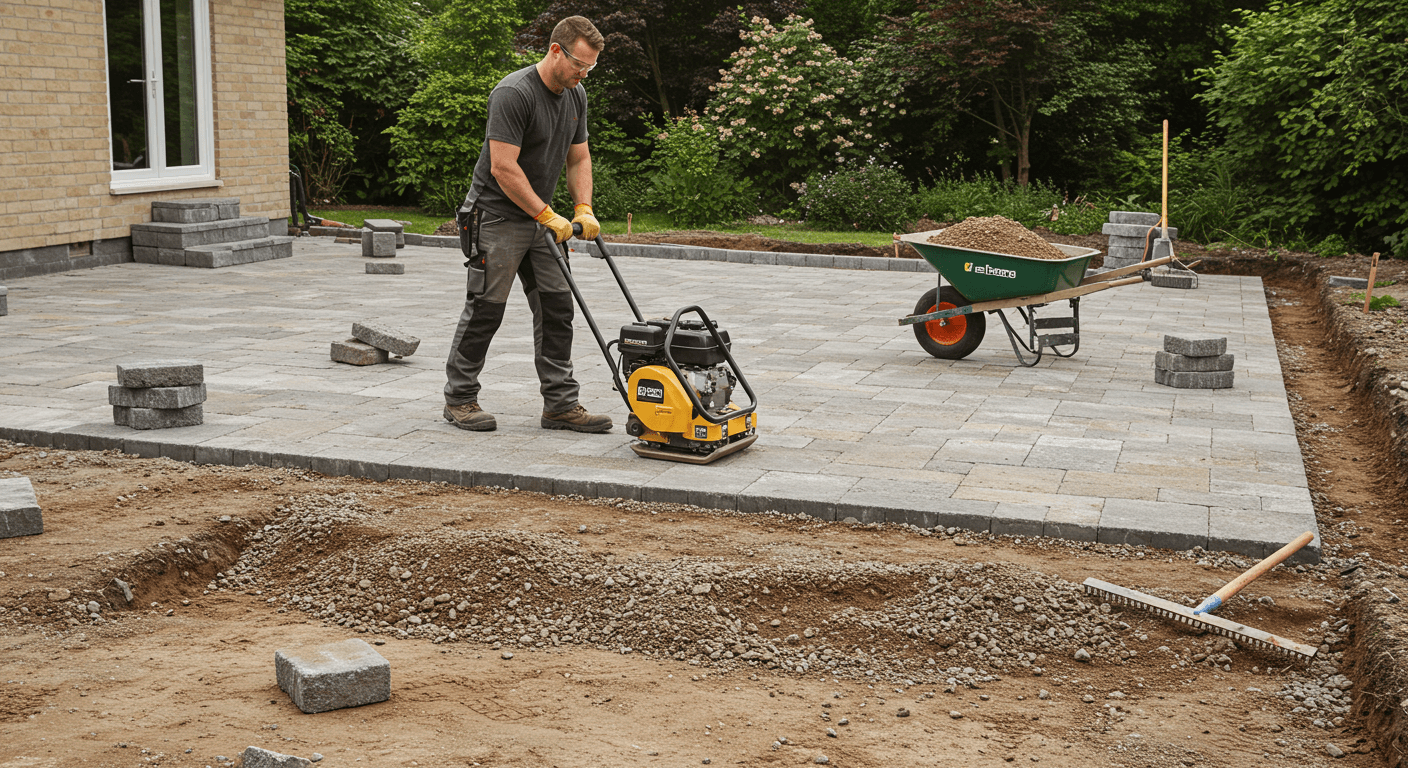
Spread crushed stone or gravel evenly, compacting it in 2–3 inch layers with a plate compactor. A strong base prevents future shifting and sinking.
Spread a 1-inch layer of coarse sand over the compacted base. Screed it flat with a board to create a smooth, even surface.
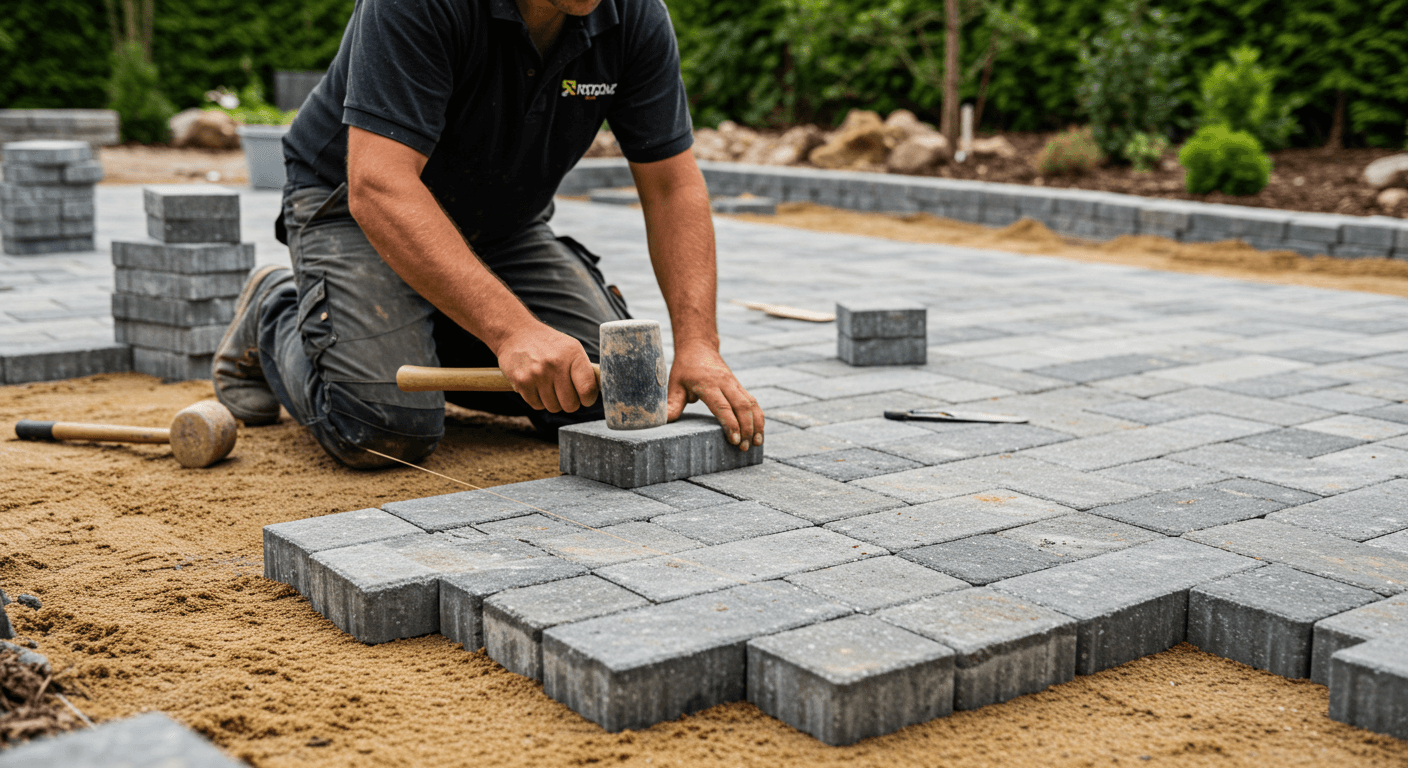
Place pavers in your chosen pattern, starting from a straight edge. Use spacers or consistent hand placement to keep uniform gaps. Tap each paver gently with a rubber mallet for stability.
Trim pavers along edges using a masonry saw or chisel. This ensures clean lines and a snug fit.
Install edge restraints around the perimeter to lock pavers in place and prevent spreading.
Spread fine sand over the pavers and sweep it into the joints. Compact the surface and repeat until joints are fully filled.
Run the plate compactor over the finished surface once more. This locks everything in place and ensures a level finish.
The way pavers are laid greatly affects the overall look and stability of the surface. Popular options include:
Even a small error can ruin the final result. Some common mistakes include:

Professionals achieve flawless installations by focusing on details.
According to the Interlocking Concrete Pavement Institute (ICPI), following proper base installation and compaction standards is the single most important factor in paver durability.
A small patio may take 2–3 days, while larger driveways can take a week or more.
Yes, with preparation and patience. However, professional installers ensure precision and speed.
6–8 inches for patios/walkways, 10–12 inches for driveways.
Not required, but sealing enhances color, prevents staining, and extends lifespan.
Properly installed and maintained pavers can last 30–50 years.
Installing pavers is more than a construction task—it’s a deeply satisfying process that turns an ordinary outdoor space into a polished, functional masterpiece. From the crunch of compacted gravel to the click of pavers fitting snugly together, every step builds toward a durable, beautiful result.
By planning carefully, using the right materials, and following a professional process, you can achieve hardscape perfection that lasts for decades.
👉 Want flawless results without the heavy lifting? Green to Gorgeous specializes in professional paver installation, delivering patios, walkways, and driveways that blend durability with design.
Let’s Build
Contact us todayGet daily tips and tricks for making your best home.
2025 Green to Gorgeous
