3 MIN READ
Gardening
Written By
G2G Team
Published
September 28, 2025
A garden pathway is never just a way to get from one point to another. It shapes how you experience your outdoor space, guiding the eye and the feet toward focal points, defining zones, and adding character. Without pathways, gardens often feel unfinished or disorganized. With them, the yard becomes intentional, functional, and inviting.
For DIY homeowners, building a pathway is one of the most satisfying #diylandscaping projects. It combines creativity and practicality in equal measure: you’re not just laying down stone or gravel, you’re crafting a journey through your landscape.
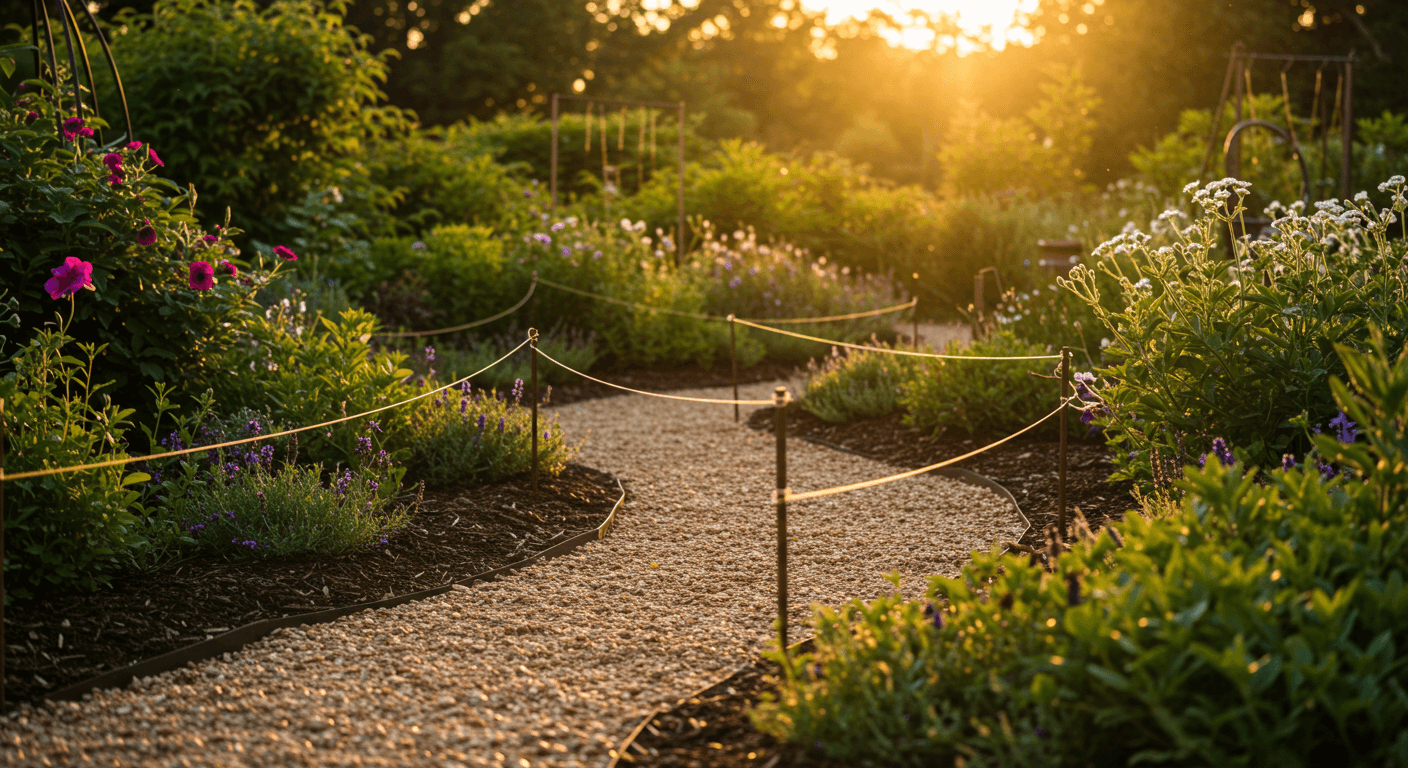
Every successful pathway begins with a clear purpose. Is this going to be a primary walkway, wide enough for two people to walk side by side? Or will it be a meandering garden trail, inviting exploration among flowers and shrubs? Your answer will shape everything that follows, from width and layout to material choice.
Imagine walking your yard. Notice the natural “desire lines”—the routes you and your family already take. These often reveal the best locations for pathways. A good design doesn’t fight against how people use the space; it enhances it.
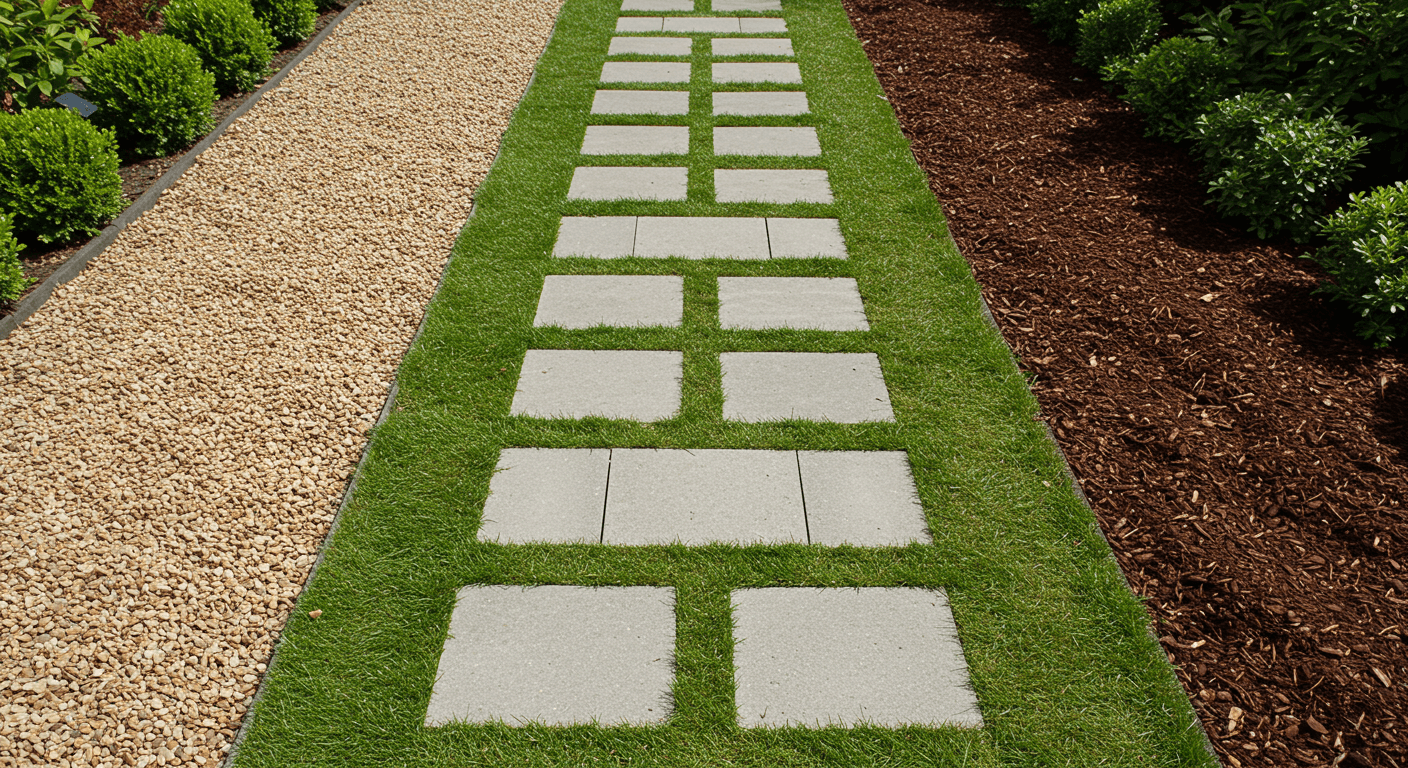
Material is more than a practical decision—it defines the mood. A gravel path crunches softly underfoot, giving a rustic or cottage feel. Pavers offer clean, structured lines that suit modern or formal landscapes. Flagstone, with its irregular edges, blends seamlessly into natural gardens, while mulch provides a simple, organic solution for lightly used paths.
Each choice has trade-offs in cost, durability, and maintenance. For example:
The right material is the one that balances function, budget, and the atmosphere you want your garden to project.
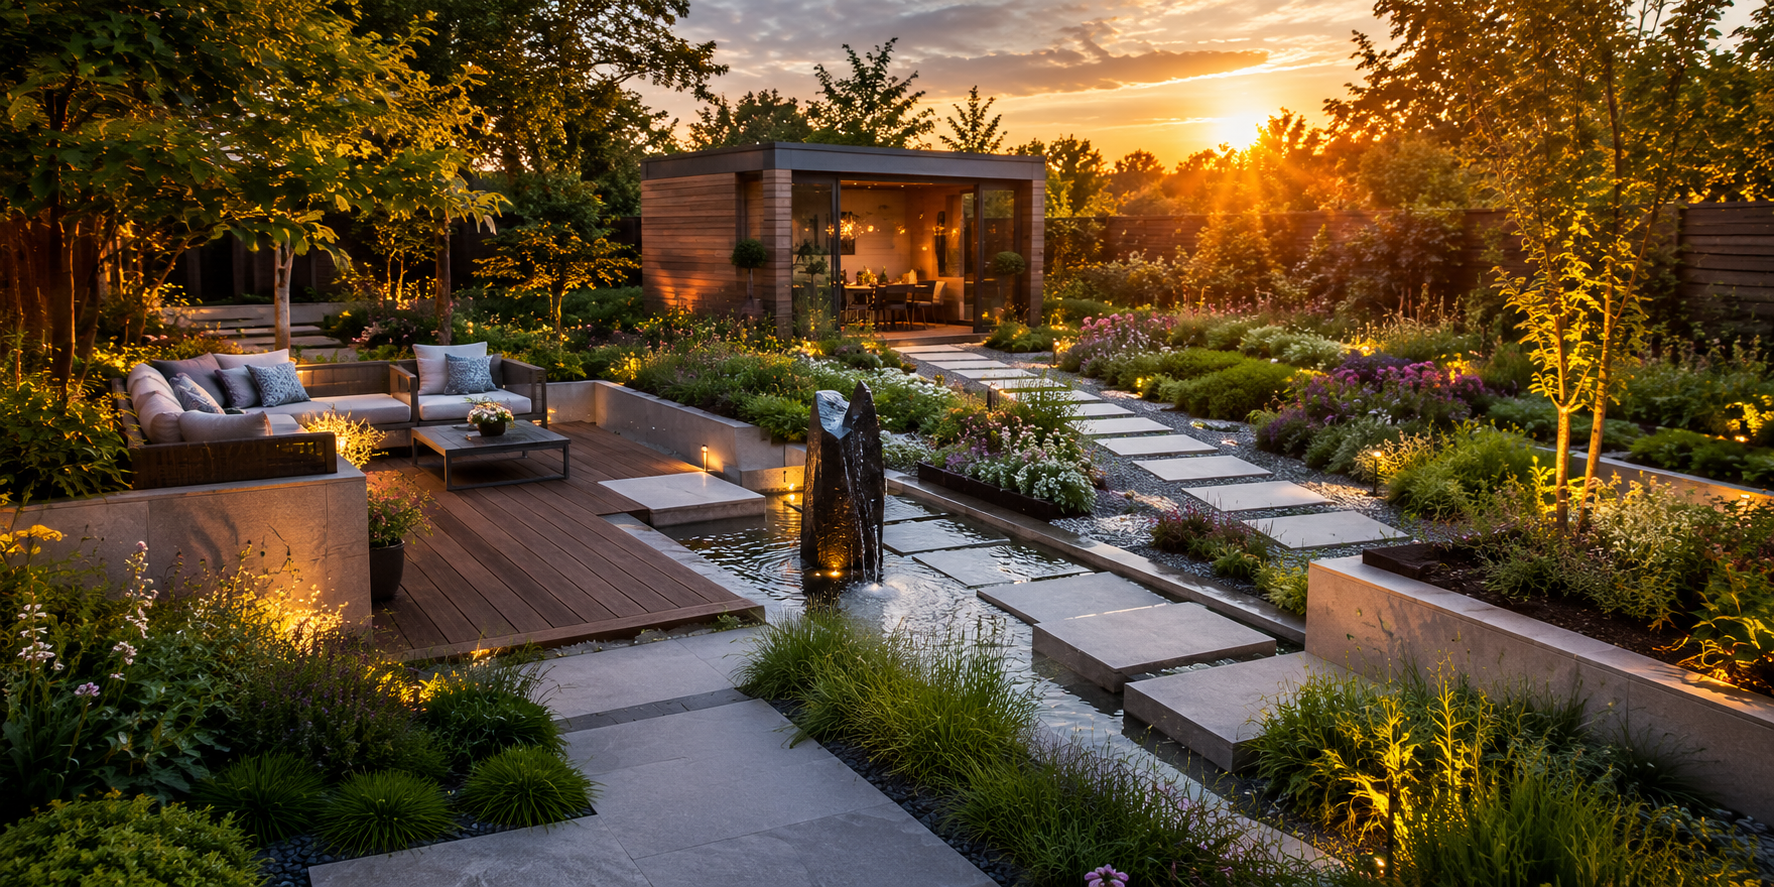
The best pathways feel like they belong. A straight, wide entry path creates a sense of formality, drawing the eye directly to the front door. By contrast, a winding garden trail slows the pace, encouraging visitors to linger. Width matters too: main walkways should be around three to four feet wide, while side paths can be narrower at two feet.
When sketching your design, don’t just think about movement—consider destinations. Where does the path lead? A patio? A bench? A hidden corner of the garden? Pathways are not just connectors; they’re storytellers that guide people through experiences.
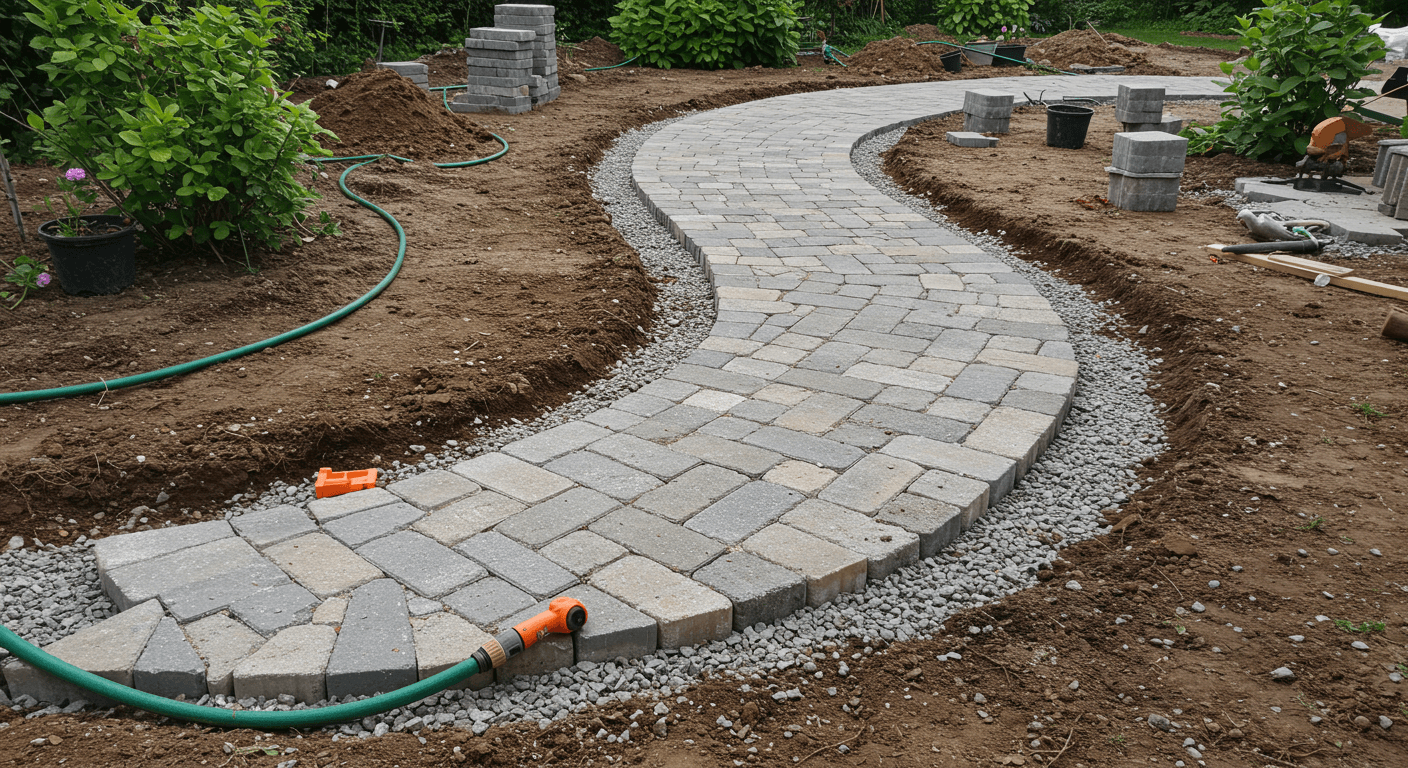
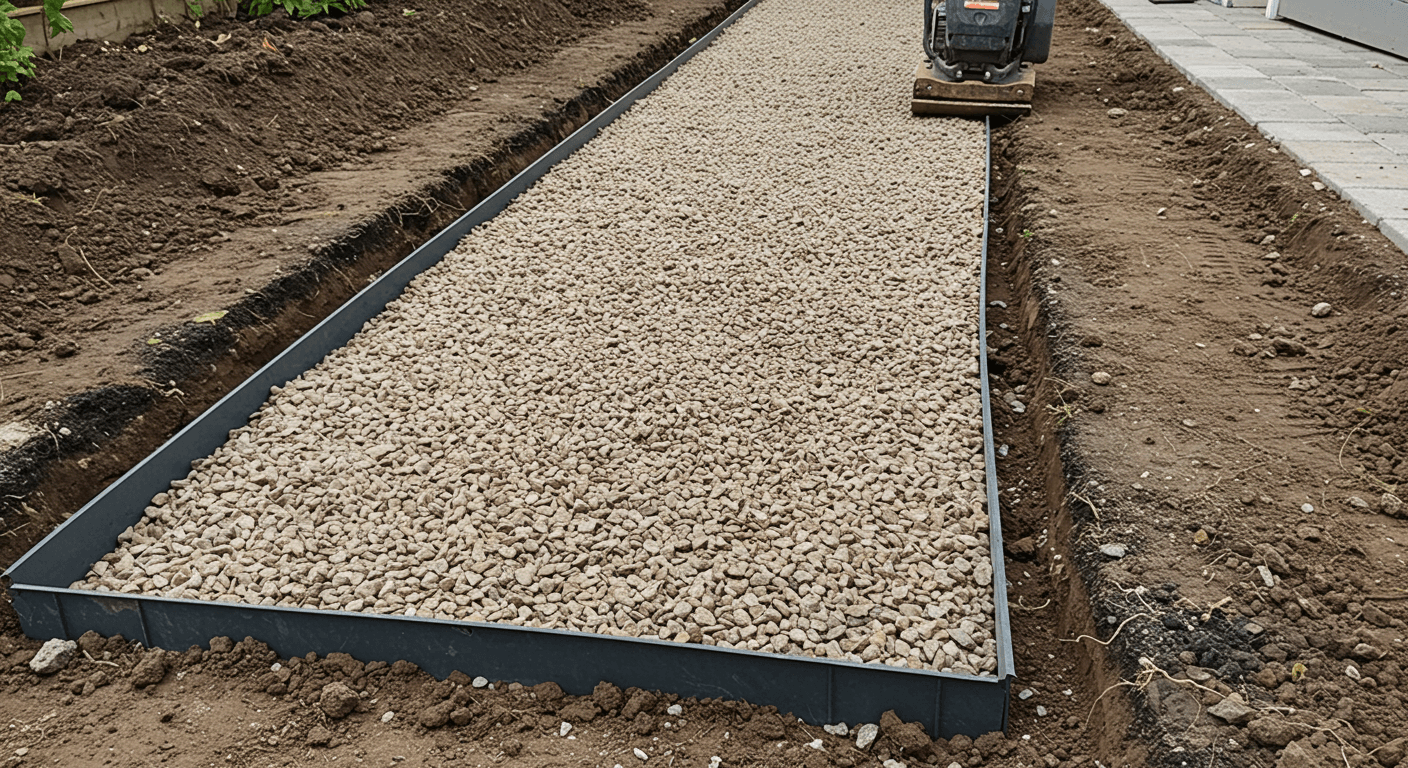
This is where many DIY projects fail. The surface materials may look beautiful on day one, but without a stable base, they quickly shift, sink, or sprout weeds. Proper preparation makes the difference between a pathway that lasts a season and one that lasts a decade.
The process is straightforward but essential: excavate to the right depth, install edging to hold the shape, and add a compacted gravel base for drainage and strength. For pavers or flagstone, a layer of sand creates the bedding that allows stones to settle evenly. Skipping this step is like building a house without a foundation.
This is where vision turns into reality. Spread gravel and compact it until firm. Lay pavers carefully on a sand bed, checking each one with a level. Fit flagstones like a puzzle, leaving gaps for gravel or moss to soften the look. With mulch, simply spread and refresh seasonally.
The key is patience. Rushing here leads to uneven surfaces, wobbly pavers, and frustration later. Work methodically, and you’ll end up with a pathway that feels solid underfoot and looks professionally crafted.
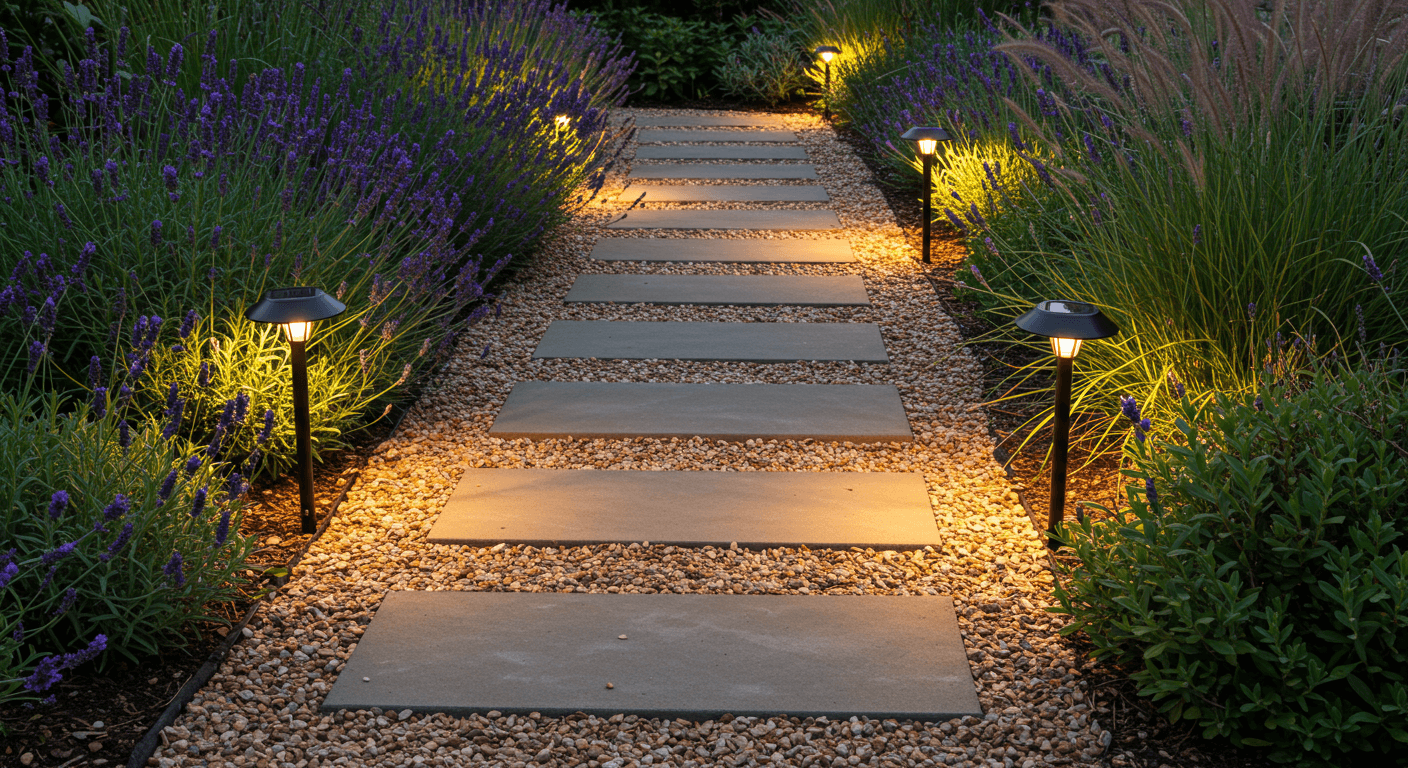
Pathways are functional, but the finishing details turn them into experiences. Soft solar lights along the edges make evening strolls magical. Border plants—like lavender, hostas, or ornamental grasses—frame the walkway with texture and scent. Even a simple focal point, such as a bench at the end of the path or a small arbor, transforms the journey from practical to memorable.
These elements don’t just decorate; they create atmosphere. They make your pathway something people want to walk, not just a route they use out of necessity.
Many DIYers underestimate pathways, thinking they’re just about laying stone. The biggest pitfalls usually include:
Avoiding these mistakes means your effort pays off with beauty and durability.
From contractors and experienced landscapers:
👉 For tailored design ideas, Green to Gorgeous specializes in DIY-friendly landscaping inspiration.
A small project can be finished in a weekend, while larger designs may stretch across several days.
Yes, unless it’s a temporary mulch path. Gravel ensures drainage and stability.
Mulch or gravel. Both are budget-friendly but require periodic upkeep.
Absolutely. Gravel with stepping stones, for example, creates contrast and durability.
Planning and building a garden pathway isn’t just a landscaping task—it’s an act of design, shaping how people experience your outdoor space. From the materials you choose to the curves you draw, every decision contributes to the atmosphere of your garden. Done well, a pathway provides structure, guides movement, and adds beauty that lasts.
When you see garden pathway planning in action, you realize you’re not just laying stone or gravel—you’re designing a journey. Step by step, your DIY landscaping project transforms into a yard you’ll love to walk every day.
👉 Ready to take your yard to the next level? Green to Gorgeous offers professional insight for homeowners tackling their own landscaping projects.
G2G Team
09-28-2025
Let’s Build
Contact us todayGet daily tips and tricks for making your best home.
2025 Green to Gorgeous