A coffered ceiling can substantially enhance the style of any room, and for homes with 8 ft ceilings, the appropriate design can make a space feel more luxurious and expansive. These ceiling treatments have become a popular choice for their capacity to add depth, character, and elegance without overwhelming the room, making them an excellent option for lower ceilings.
This article presents a variety of inspiring coffered ceiling concepts tailored specifically for 8 ft ceilings. From classic wood-paneled designs to modern geometric patterns, each idea offers a unique way to enrich your home’s aesthetic and establish a stunning focal point that complements your décor.
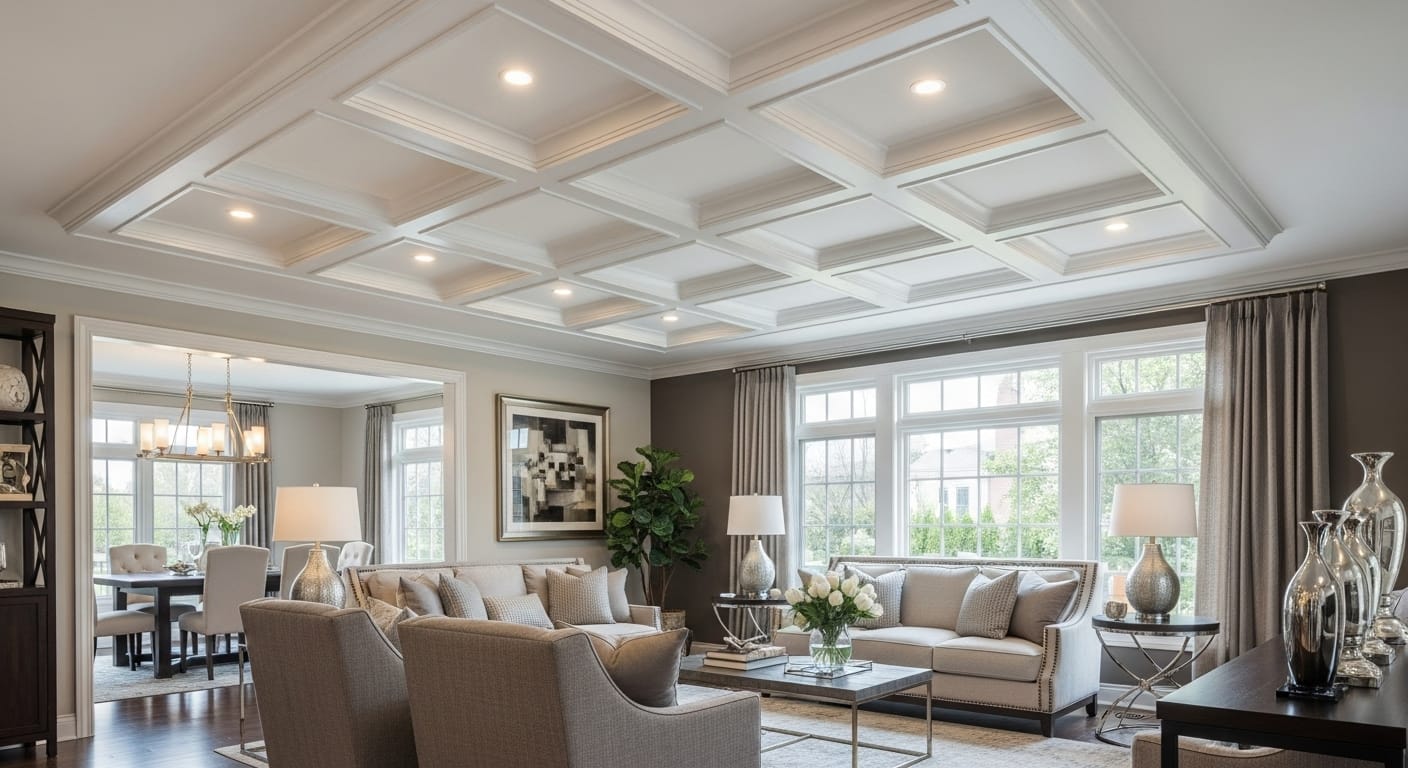
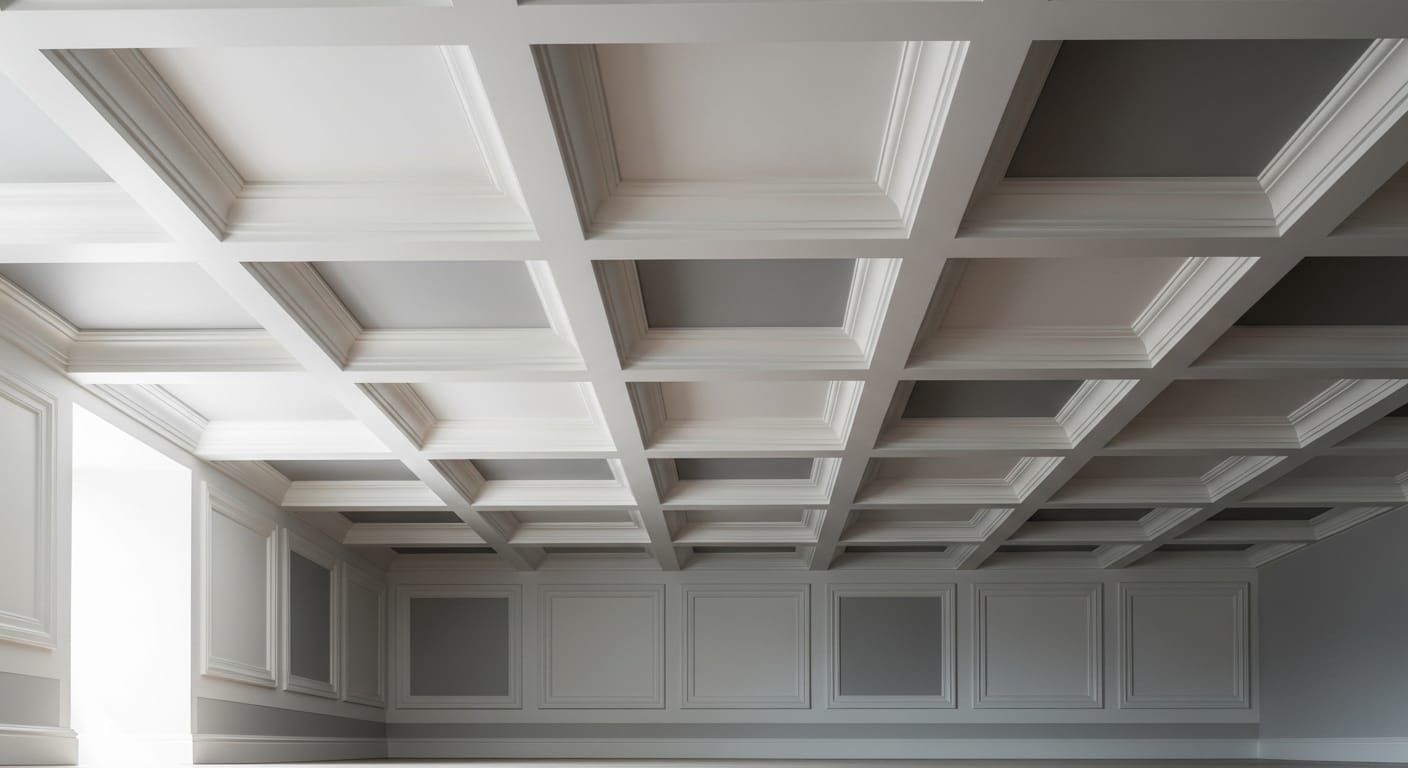
A statement ceiling can enhance a room without overwhelming it. Classic white coffered ceilings with sharp moldings offer a perfect balance of sophistication and simplicity, providing an elegant, timeless look that remains perpetually in style. For a ceiling that elevates an entire room, this design is an excellent choice.
Visualize a bright, airy room featuring a pristine white ceiling with perfectly aligned, sharp moldings that form a grid pattern. The clean lines add depth and structure without creating clutter, making the ceiling appear higher and more expansive. The subtle shadows cast by the moldings introduce a touch of texture, drawing the eye upward gracefully. The effect is akin to a well-tailored suit—timeless and sharp.
This classic design is versatile, working well in both traditional and modern spaces. A matte finish can soften the crispness, while a slight sheen can add a touch of glamour. For a more dramatic effect, pair it with dark wall colors to enhance the contrast. Seasonal accents, such as faux greenery or subtle lighting, can alter the ambiance without changing the core design. The key is to maintain sharp, clean lines for a polished appearance.
Begin with high-quality crown molding or pre-made coffered ceiling kits, which are available at most home improvement stores. Measure your ceiling carefully and plan your grid pattern; simple squares or rectangles work best for 8 ft ceilings. Use a level and painter’s tape to mark the lines before installing the moldings with a strong adhesive and small nails. Fill any gaps or nail holes with putty, then paint everything in a bright white for a seamless look. Professional assistance may be beneficial for achieving perfect precision.
For a luxurious effect, consider adding subtle accents like gold or silver leafing on the moldings. Incorporate thin LED strip lights inside the coffers for a soft glow that highlights the design. You can also experiment with textured paints or wallpapers inside the grid for a unique twist. Personal touches, such as small decorative elements within the coffers, can make the ceiling more engaging without detracting from its classic appeal.

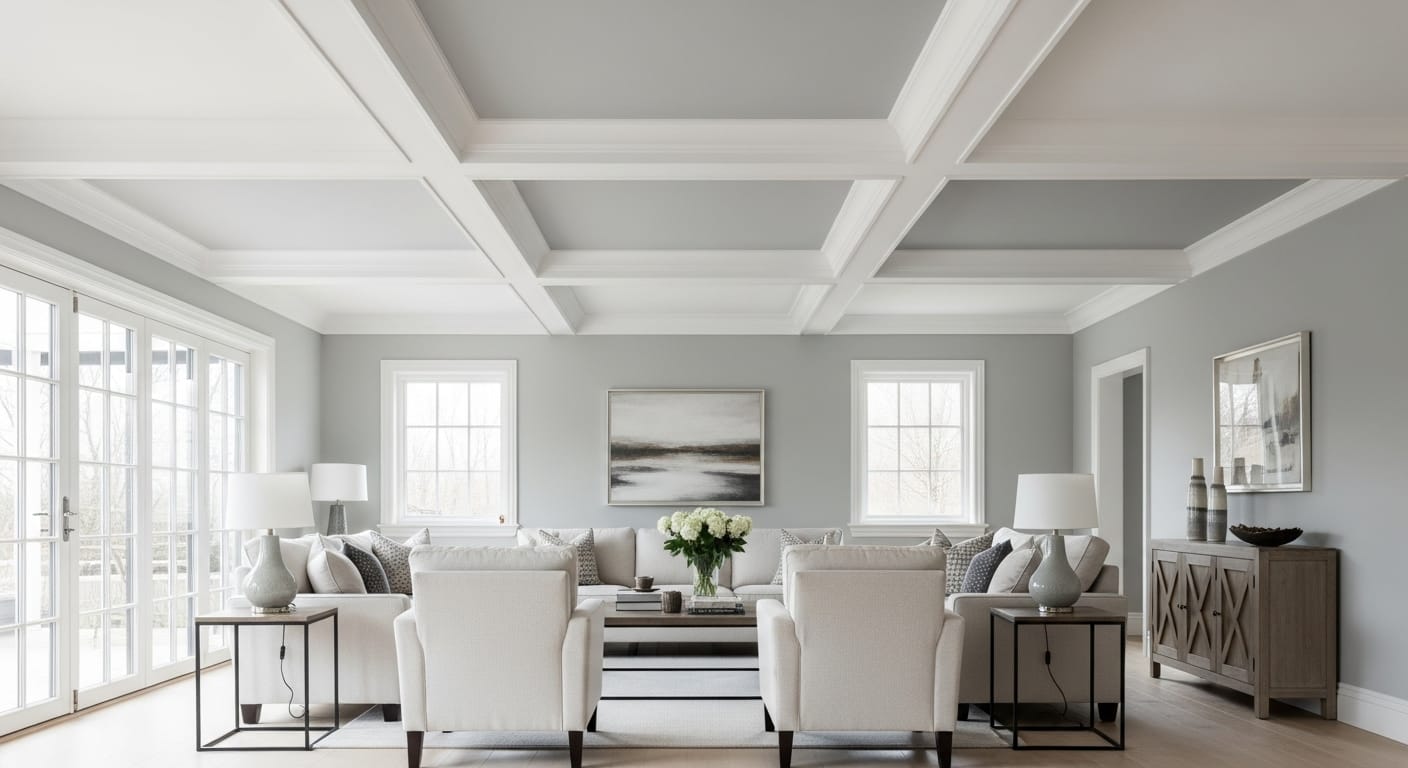
For those who find plain white ceilings uninspiring but are hesitant to use bold colors, painting the inside of coffers with a soft gray offers a perfect middle ground. This technique adds depth and sophistication without overwhelming the space, providing an understated way to elevate your ceiling design and create a subtle focal point.
Picture a living room where a light gray hue inside the coffered sections gently contrasts with bright white moldings. The soft gray adds dimension, making the ceiling appear more layered and interesting. The shadows cast by the moldings become more noticeable, creating a sense of depth that draws the gaze upward. The overall effect is calming, refined, and effortlessly stylish.
You can opt for darker shades of gray for a more dramatic look or stick with lighter tones for a subtle upgrade. Pairing the gray inside the coffers with wall colors in blush, navy, or pastel shades can enhance the elegant feel. Seasonal changes, such as adding warmer tones or metallic accents, can further personalize the look. This approach works well in both contemporary and transitional decor styles.
Begin by selecting a soothing gray paint that complements your room’s palette. After installing the coffered grid, tape off the moldings to keep the paint confined to the coffers. Use a high-quality brush or roller for a smooth application, avoiding streaks or drips. Allow adequate drying time before applying a second coat if needed. For a polished look, lightly sand any imperfections and seal with a clear matte or satin finish. This project requires patience but offers a significant visual payoff.
Introduce metallic or pearlized paints inside the coffers for a subtle shimmer. Incorporate textured finishes or a slight gloss on the gray paint to add richness. Complement the ceiling with throw pillows or rugs in matching or contrasting shades to tie the room together. Adding a few decorative architectural elements, such as corbels or small columns, can amplify the sophisticated atmosphere.
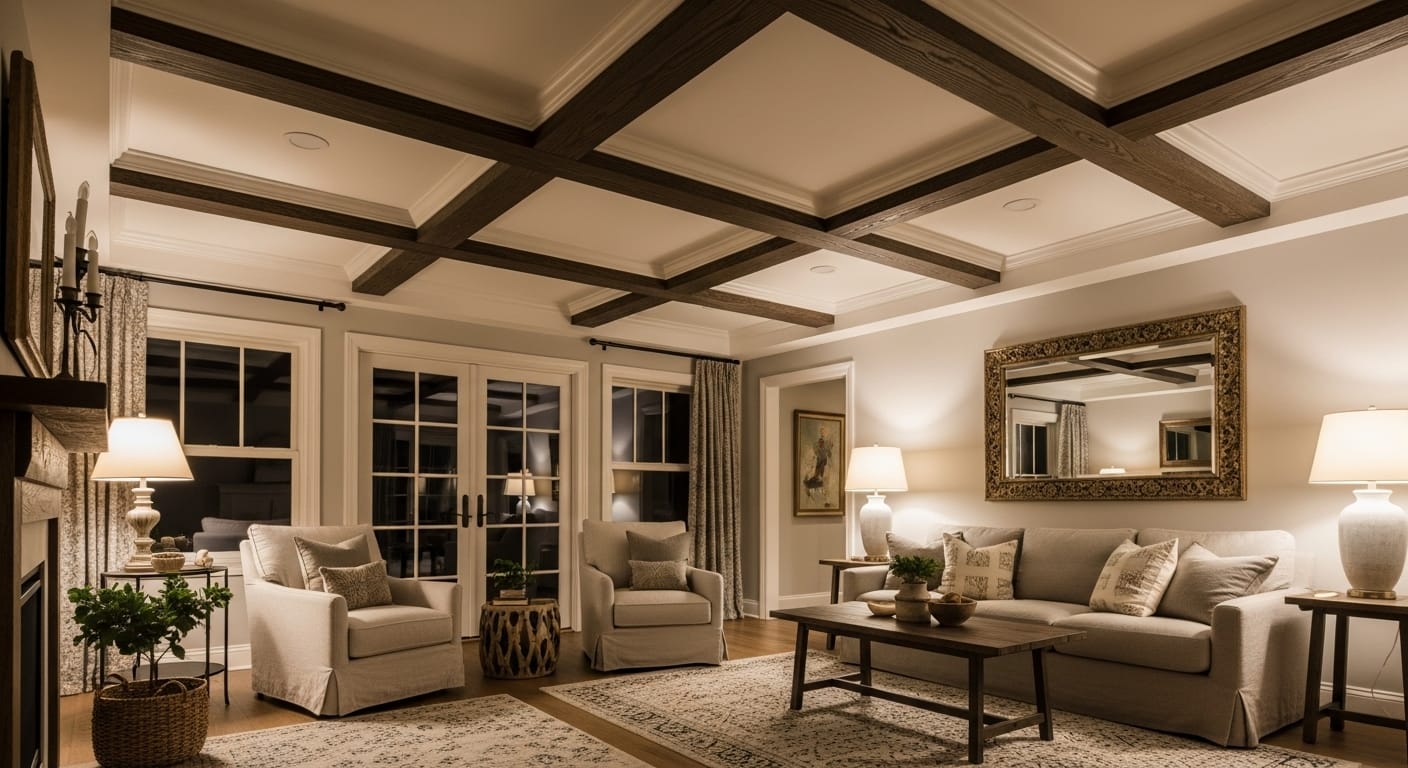
To add warmth and texture to your ceiling without the expense of real wood, faux wood beams placed within coffers can provide a rustic charm that instantly transforms a space. This is an ideal solution for creating cozy, inviting atmospheres in both modern and country-style homes.
Imagine a ceiling with dark faux wood beams spanning across a softly painted coffered grid. The textured wood grain adds visual interest and a tactile element that makes the ceiling feel more substantial. Light reflects off the faux wood’s surface, lending warmth and richness to the room. The beams create a sense of structure and depth, making the space feel grounded and welcoming.
You can choose lighter or darker faux wood finishes depending on your style—weathered gray for a reclaimed look or deep walnut for richness. For a more contemporary twist, pair the beams with sleek, minimal moldings and neutral walls. Seasonal accessories like cozy textiles or vintage decor can enhance the rustic vibe. This design adapts well to open-plan spaces or more intimate rooms seeking character.
Start by selecting faux wood beams crafted from lightweight materials like polyurethane or high-density foam. Measure your ceiling and decide where to place the beams for optimal visual balance. Attach the beams securely using construction adhesive and optional nails or screws, ensuring they are flush and level. You can finish them with a stain or paint if desired and seal for added durability. Adding small decorative corbels or brackets can enhance the rustic look.
Customize the beams with distressing or staining techniques to match your decor. Incorporate LED strip lighting between the beams for soft, indirect illumination. Add vintage-inspired hardware or decorative accents at the beam joints for extra charm. Layering textiles like woven rugs or burlap curtains can complement the rustic aesthetic perfectly.
To add a touch of glamour to your ceiling without it being overwhelming, applying metallic accents in gold or bronze to coffered moldings can instantly elevate the look. This creates a subtle luxury that catches the light and adds a sophisticated sparkle, ideal for achieving a high-end atmosphere.
Visualize a coffered ceiling with gold leafing or bronze paint highlighting the moldings. The metallic finish reflects ambient light, creating a warm glow that makes the room feel opulent. The shadows cast by the recessed panels shimmer softly, emphasizing the geometric design. This turns your ceiling into a piece of art that commands attention without dominating the space.
You can opt for a brushed or matte metallic finish for a more understated look, or choose a shiny finish for maximum impact. Pair these accents with rich, dark wall colors like navy or charcoal for a dramatic contrast. For a more contemporary style, combine metallic accents with sleek, clean-lined moldings. Seasonal decor can include velvet throws or satin cushions that complement the luxurious ceiling.
Start by choosing high-quality metallic paint or leafing material designed for trim and moldings. Carefully tape off the non-metallic areas before applying the finish to ensure crisp edges. Use a fine brush or a foam roller for a smooth application, avoiding streaks. Multiple thin coats will yield the best results, and sealing with a clear topcoat will preserve the shine. Patience is key, allowing adequate drying time between coats for a flawless look.
Add small decorative elements like metallic corner accents or leaf motifs within the coffers for extra flair. Incorporate lighting fixtures that reflect the metallic sheen, such as sconces or chandeliers with gold or bronze finishes. You can also mix metals for an eclectic, layered effect that feels curated and luxurious. Textured fabrics or plush rugs in matching tones will further enhance the opulent atmosphere.
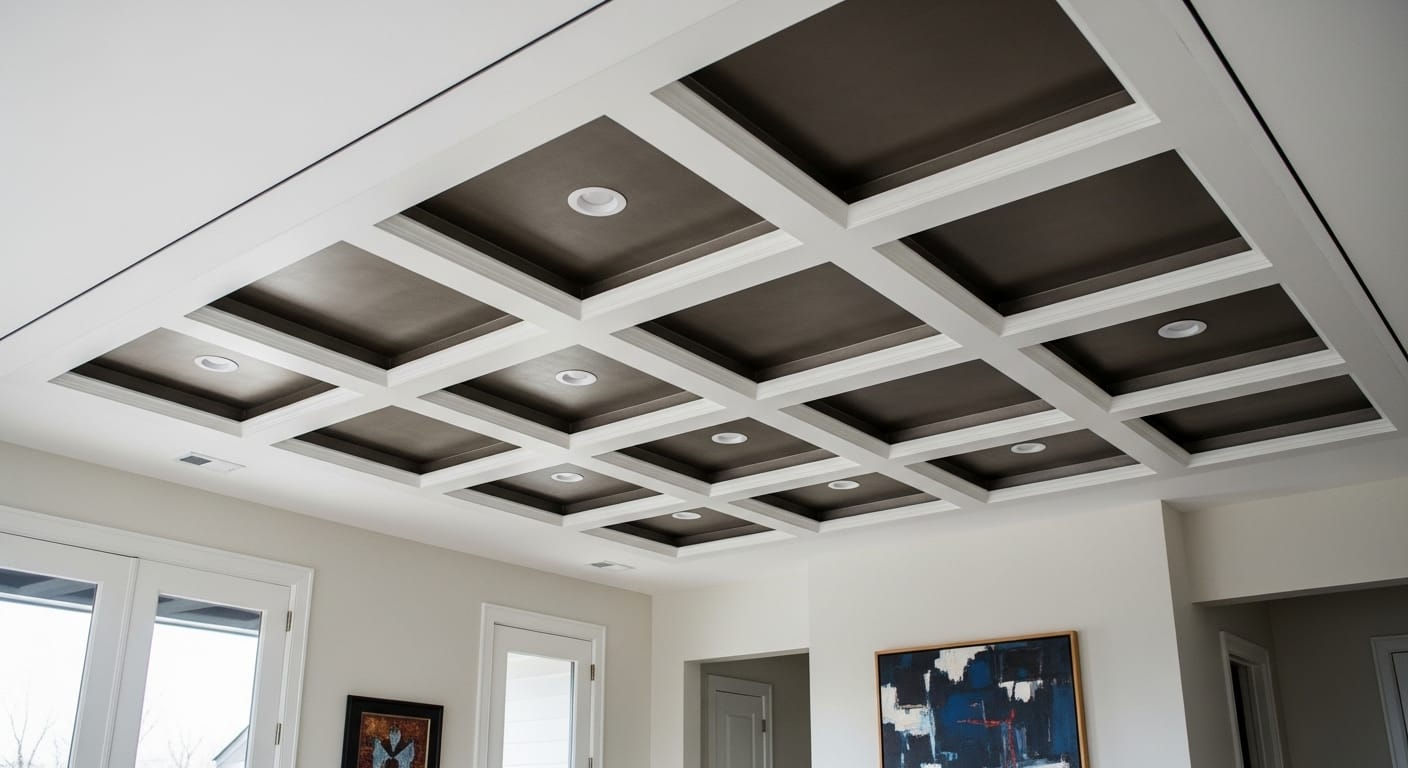
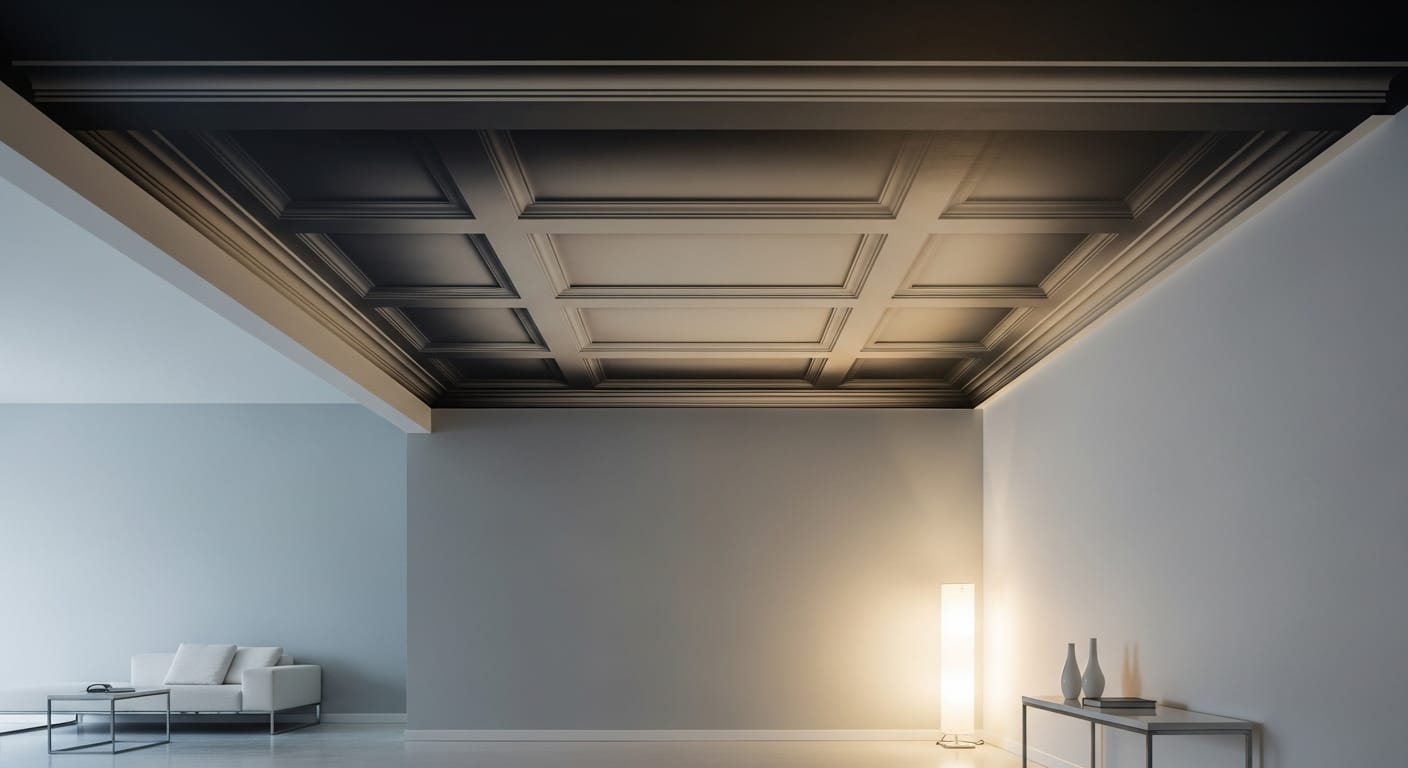
To create a bold statement that completely transforms your ceiling, painting the inside of coffers with a dark color against light walls and moldings offers striking contrast and instant drama. It is a simple way to add depth and sophistication without requiring heavy renovations, perfect for a modern, eye-catching look.
Envision a ceiling with a deep charcoal or navy hue inside the coffers, set against crisp white moldings and light-colored walls. The contrast makes the grid pattern stand out, giving the illusion of higher ceilings and more dimension. The shadows deepen within the panels, creating a layered, textured effect that draws your attention upward. It is like giving your ceiling a bold frame that commands focus.
Choose darker shades like black, deep gray, or rich navy for a dramatic feel, or opt for softer dark tones like espresso or slate for a subtle sophistication. Pair these with light-colored or pastel walls to maximize the contrast. You can also incorporate metallic or textured paints inside the coffers for added dimension. Seasonal accents like warm blankets or light wood furniture can soften the overall look if it feels too stark.
Begin by selecting a high-quality, washable dark paint that is suitable for ceilings. Carefully tape off the moldings and walls to avoid smudges. Apply multiple thin coats for even coverage, letting each dry thoroughly. Use a roller with a thick nap for the panels and a brush for the corners. For a seamless finish, lightly sand and touch up any uneven spots before sealing with a matte or satin topcoat. Patience is key to achieving crisp edges and a flawless finish.
Add gold or metallic accents to the moldings for a touch of luxury amid the dark contrast. Incorporate textured fabrics or layered textiles in your decor to balance the bold ceiling. Use lighting strategically, such as uplights or sconces, to highlight the contrast and create a specific mood. Personal touches like decorative hardware or subtle patterns inside the coffers can make the design uniquely yours.

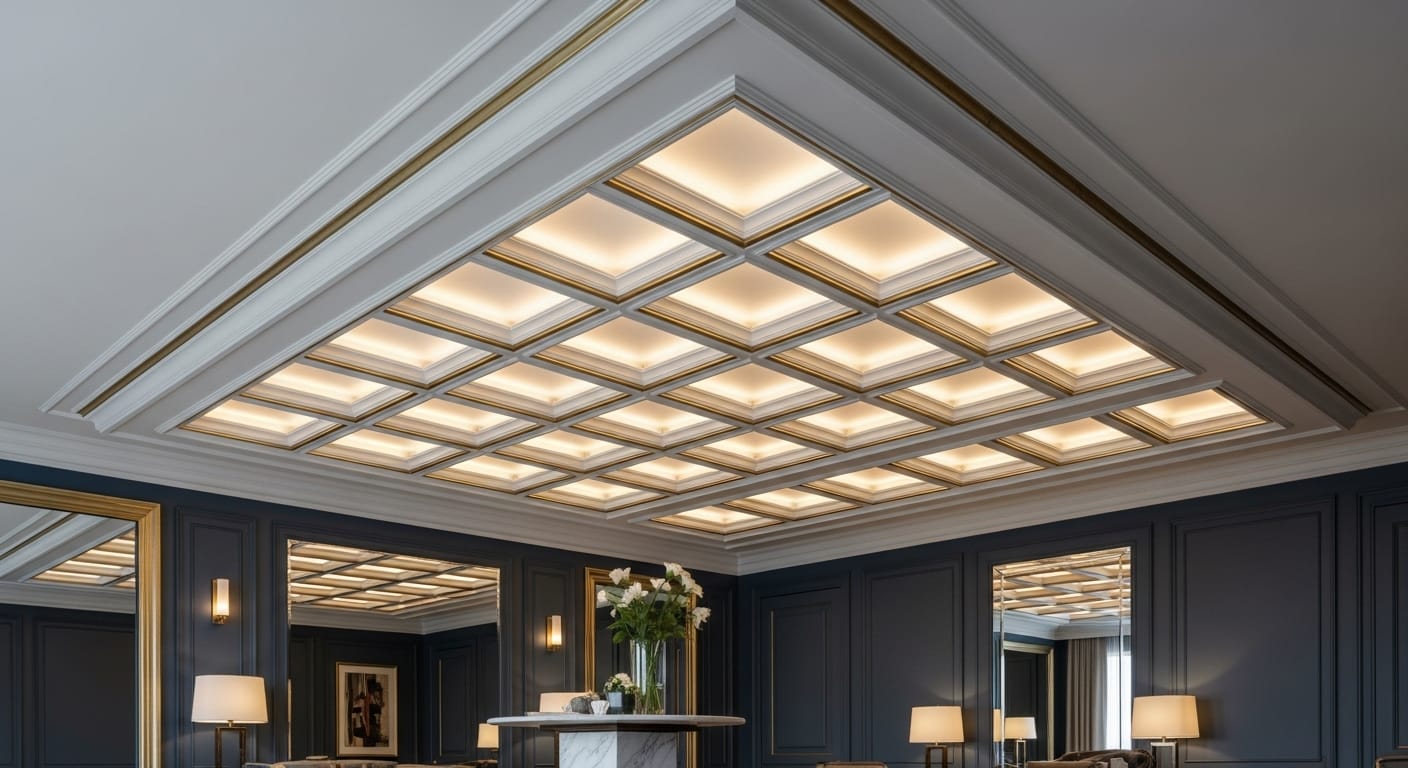
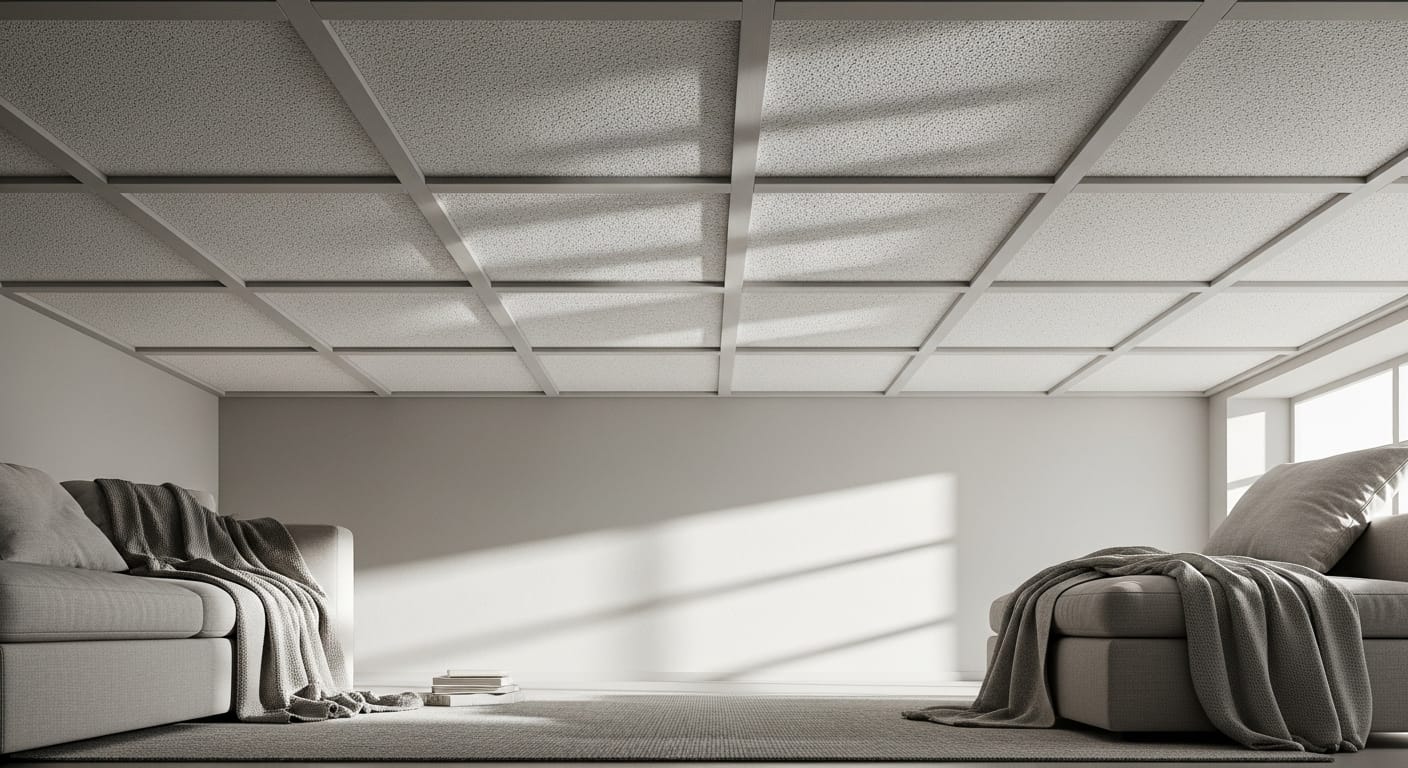
To create a cozy, inviting atmosphere without adding clutter, installing recessed LED lighting inside coffers offers a sleek, modern way to introduce soft ambient light. This technique is perfect for enhancing the mood of a room and highlighting its architectural details, combining subtle elegance with functional lighting.
Imagine a ceiling where hidden LED strips glow gently from within the coffers, casting a warm or cool light. The light diffuses evenly, creating a seamless glow that emphasizes the grid pattern. The shadows from the moldings add depth, making the ceiling feel more expansive. The overall effect is calming, sophisticated, and effortlessly chic—an ideal backdrop for relaxing evenings or intimate gatherings.
You can choose color temperatures that suit your desired mood—warm white for cozy nights or cool white for a more energetic atmosphere. Integrating dimmer switches allows you to control the brightness and create different ambiances. For a more dramatic look, you can combine the lighting with reflective or metallic finishes inside the coffers. This setup works well in traditional, modern, or transitional interiors, adapting seamlessly to your style.
Start by selecting high-quality, flexible LED strip lighting designed for coving or architectural applications. Measure the depths and lengths of your coffers to determine the amount of lighting needed. Attach the strips securely using mounting clips or adhesive, ensuring even placement. Connect the wiring neatly along the moldings and hide the controls for a clean look. Test the lights before sealing everything in place, and install a dimmer if desired for versatile ambiance.
Add color-changing LEDs for dynamic effects during holidays or parties. Incorporate smart controls to adjust the lighting remotely. Combine the lighting with textured or matte paints inside the coffers to either soften or enhance the glow. You can personalize the look further with decorative trim or subtle metallic accents that reflect the light beautifully.

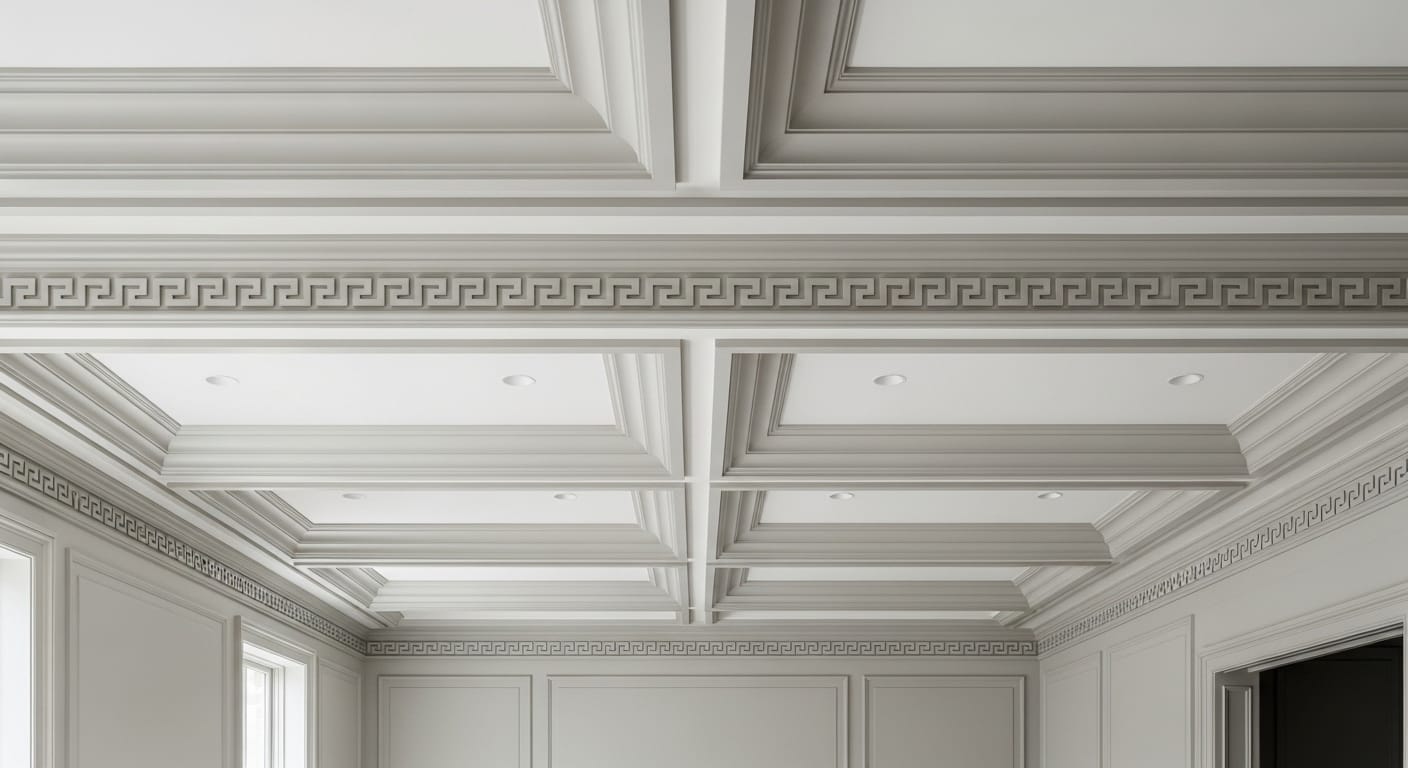
To introduce a touch of artistry and craftsmanship to your ceiling, adding decorative molding patterns within the coffers can bring intricate detail and visual interest. This technique elevates a simple grid into a stunning focal point, ideal for those who appreciate craftsmanship and unique design.
Picture a ceiling with ornate, carved patterns or layered moldings inside each coffer. The intricate details catch the light and cast delicate shadows, creating a textured, three-dimensional effect. These patterns add a sense of luxury and uniqueness, making your ceiling stand out in a sophisticated way. It is like turning your ceiling into a piece of architectural art.
You can choose from classic motifs like floral, geometric, or Greek key patterns, or create custom designs for a personalized touch. Pair these with rich paints or metallic finishes to further emphasize the details. This approach works beautifully in traditional, vintage, or eclectic interiors. Seasonal accents, such as small decorative elements within the patterns, can add variety.
Begin by selecting or designing your molding patterns; pre-made or custom-carved moldings are available online. Carefully plan your layout, marking where each pattern will go using painter’s tape and levels. Attach the moldings securely with adhesive and nails, ensuring seamless joins between the pieces. Fill any gaps with caulk, sand them smooth, and then paint or stain for a refined finish. Patience is key for achieving perfect alignment and detail.
Highlight specific details with metallic or contrasting paints to make them stand out. Incorporate small LED accent lights within the patterns for added depth. You can personalize the design by adding small decorative elements like rosettes or medallions at key points. Using textured or gloss paints can give a more tactile, luxurious feel.
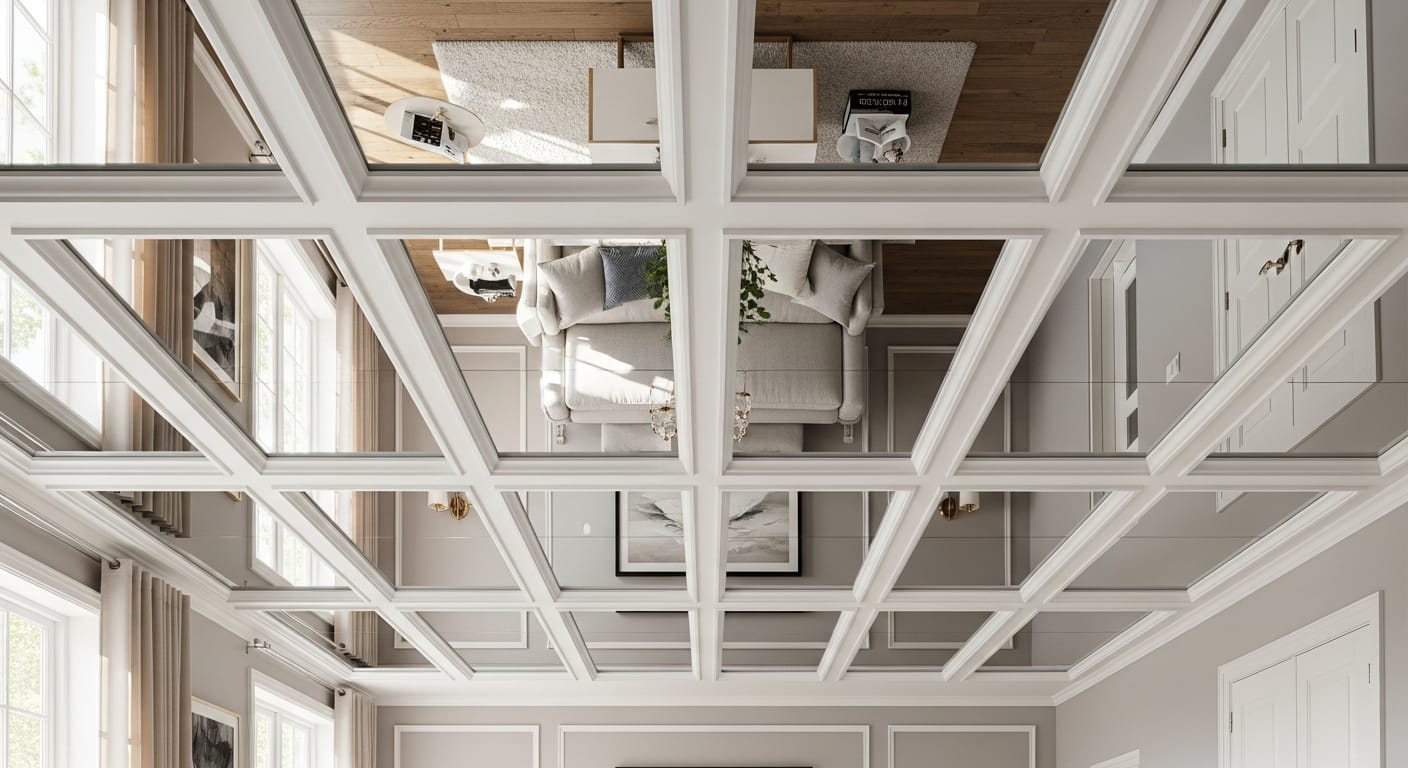
To make a room feel brighter and larger without extensive renovations, fitting mirror panels into the coffers can reflect light and create an illusion of expanded space. This is an elegant, functional twist that can dramatically change the feel of any room, especially for those craving openness and brightness.
Visualize a ceiling with large, framed mirror panels inside each coffer, bouncing natural and artificial light around the room. The reflections multiply the sense of space, making even small rooms feel airy and open. The mirrors add a glossy texture that contrasts beautifully with matte walls, creating a contemporary, polished look. It is like installing a piece of art that also brightens your home.
You can choose frameless mirror panels for a sleek look or ornate frames for a vintage feel. Frosted or tinted mirrors can soften the reflections and add a unique aesthetic. Pair the mirrors with minimalist furniture and neutral walls to maximize the reflective effect. Seasonal decor like soft textiles or subtle lighting can enhance the overall ambiance.
Measure your coffers carefully and select mirror panels that fit snugly within the grid. Use heavy-duty mirror adhesive or clips designed for wall mounting, ensuring they are rated for ceiling use if necessary. Install the panels securely, making sure there are no gaps or wobbling. Finish with a protective sealant to minimize scratches and smudges. Regular cleaning will keep the mirrors sparkling and effective.
Frame the mirrors with decorative moldings or metallic trims for added style. Incorporate LED backlighting behind the panels for a luminous glow. You can mix different mirror styles or add etched designs for a bespoke look. Keep the surrounding decor simple to allow the mirrors to truly stand out.
For a ceiling that offers visual interest without overwhelming the space, applying textured paint inside the coffers can add a subtle pattern and depth, giving your ceiling a crafted, artistic touch. This is a clever way to elevate your decor with minimal effort, perfect for those who appreciate understated sophistication.
Imagine a ceiling with a soft, tactile finish inside each coffer—perhaps a subtle swirl, stipple, or linen-like texture. This textured surface catches light differently throughout the day, creating gentle shadows and a sense of movement. It adds richness and complexity without the need for elaborate moldings or patterns. The overall effect is calm, elegant, and inviting.
You can select from various textures, such as a smooth stipple, a rough plaster, or fabric-inspired finishes, to match your decor style. Pair these textures with neutral or monochrome color schemes to emphasize them. Seasonal accents like soft textiles or layered lighting can complement the textured ceiling beautifully. This technique is adaptable to both modern and traditional interiors.
Begin by preparing the ceiling surface, ensuring it is smooth and dust-free. Choose a textured ceiling paint that is suitable for your desired pattern and finish. Use a roller or a sprayer for an even application, following the manufacturer’s instructions. Apply multiple coats if necessary, allowing each to dry thoroughly. For a more intricate effect, consider using stencil techniques or sponging for added variation. Seal with a clear matte topcoat for durability.
Experiment with different textures inside different coffers for a custom mosaic effect. Incorporate subtle color variations or metallic sheens for extra depth. Use lighting to cast shadows that enhance the tactile patterns. Personal touches like painted borders or decorative edging can make the textured ceiling a signature feature of the room.
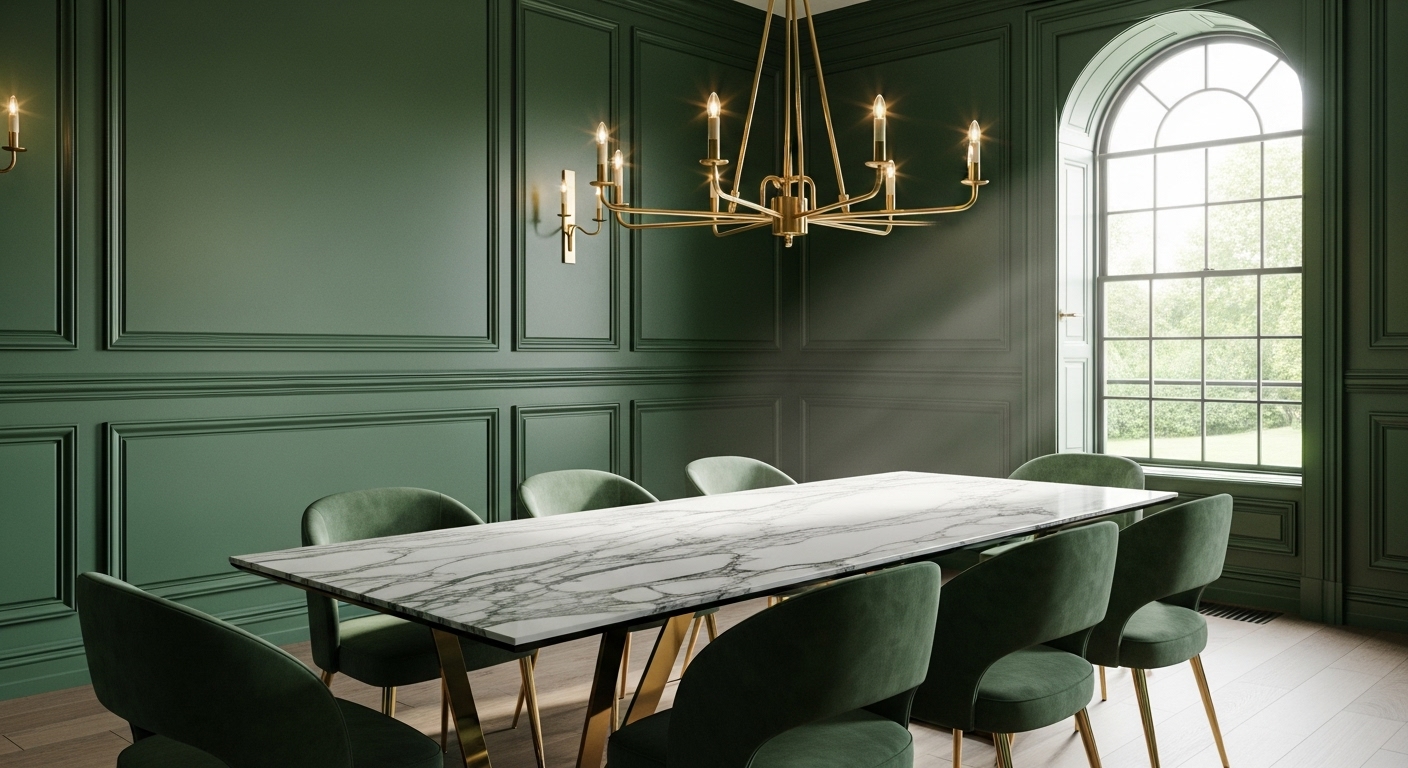
To make your ceiling a prominent feature, using accent colors inside the coffers that coordinate with your room’s palette can create a cohesive and eye-catching effect. This is a bold approach that draws attention upward and adds a significant amount of personality to the space.
Visualize a ceiling with a deep blue or emerald green painted inside the coffers, contrasting with crisp white moldings. The vibrant interior color enhances the architectural detail, making the ceiling a focal point. The interplay of shadows and light on the painted surfaces creates a layered, dynamic look. It is like adding a splash of color without painting all the walls.
Choose colors that either complement or contrast with your walls; for example, you could pair warm tones with cool backgrounds or vice versa. Incorporate patterns or metallic accents within the coffers for added interest. Seasonal changes can include swapping pillow covers, throws, or other decorative accessories that match your chosen accent colors. This approach is versatile and highly customizable.
Select a high-quality, durable paint in your chosen accent color. Carefully tape off the moldings and walls to prevent bleed-through. Use a brush for the edges and a roller for the larger panels, applying multiple thin coats for an even color. After the paint has dried, inspect for any necessary touch-ups and seal with a clear matte or satin finish. Using precise tape lines will help maintain a clean, professional look.
Add metallic or glitter accents inside the coffers for an extra sparkle. Incorporate decorative trim or molding overlays in contrasting colors. Use lighting to highlight the accent colors, such as uplights or directional spotlights. Personal touches like decorative hardware or patterns can make the design uniquely yours.
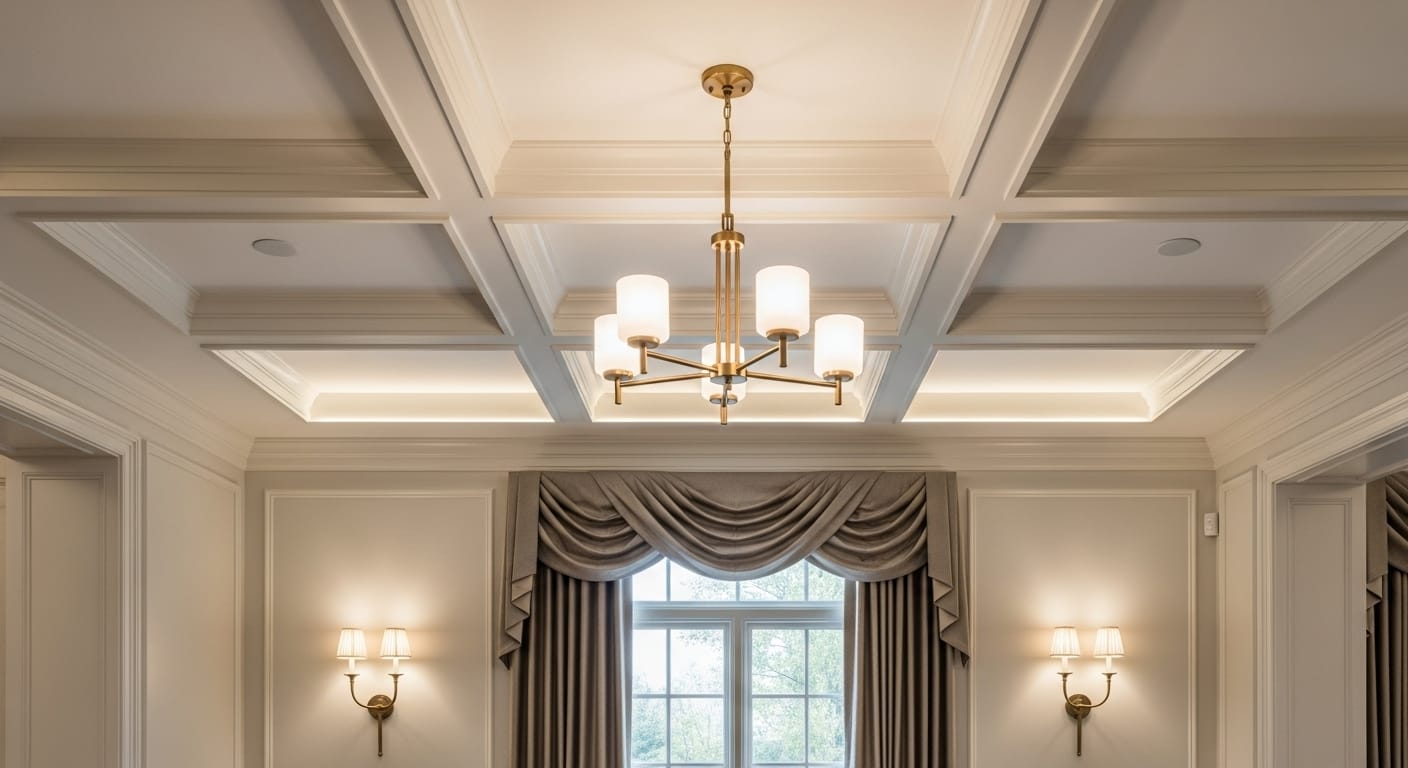
For a regal and elegant room, combining a coffered ceiling with crown molding can create a luxurious, layered effect that elevates any space. This classic approach adds architectural depth and sophistication, making it a perfect fit for those who desire a dramatic, high-end feel.
Picture a room with a coffered ceiling framed by ornate crown molding that flows seamlessly into the walls. The detailed moldings draw the eye upward, emphasizing the room’s height and grandeur. The grid pattern of the coffers adds structure, while the moldings soften the transition to the walls for a cohesive look. The overall effect is majestic and polished.
You can opt for elaborate, carved crown moldings for a vintage or traditional atmosphere, or sleek, simple profiles for contemporary elegance. Paint the moldings in a contrasting color or finish to make them stand out. Decorate the room with rich fabrics, chandeliers, or antique furniture to complement the regal aesthetic. Seasonal accents like floral or ribbon details can add a festive charm.
Start by selecting high-quality crown molding and coffered ceiling materials, which can be either pre-made or custom-cut. Install the crown moldings first, ensuring precise miter cuts and secure attachment. Next, construct the coffers using the same careful measurements, attaching the panels with adhesive and nails. Finish with paint or stain, and add decorative trim or accents as desired. Precision tools like a miter saw and a level are essential for a flawless finish.
Add gold or metallic accents to the crown molding for extra opulence. Incorporate layered lighting, such as chandeliers and wall sconces, to highlight the architectural features. You can personalize the design with decorative medallions or motifs within the crown moldings. Use plush textiles and antique accessories to complete the luxurious ambiance.
A ceiling design that feels fresh, sleek, and contemporary can be achieved with modern geometric coffers featuring clean lines. This approach gives a space a minimalist, sophisticated edge, making it perfect for urban, industrial, or modern interiors that aim for a crisp, uncluttered look.
Visualize a ceiling with a precise grid of rectangular or square coffers, painted in neutral tones. Sharp, straight lines define the pattern, creating a sense of order and structure. The light plays evenly across the surface, emphasizing the geometric shapes. The minimalist design can make the space feel larger and more organized, resembling a piece of modern art overhead.
You can use monochrome shades or subtle color contrasts to keep the look sleek, or incorporate metallic or matte finishes for texture. This style pairs well with minimalist furniture, glass accents, and open floor plans. Seasonal updates, such as adding bold rugs or artwork, can refresh the overall aesthetic without altering the ceiling.
Begin by sketching your pattern and measuring your ceiling accurately. Use painter’s tape and a level to mark out the grid lines precisely. Construct the coffers using flat moldings or panels that fit within the grid. Attach them securely with adhesive and nails, ensuring clean, straight joints. Paint in your chosen color, keeping the lines crisp and the edges sharp. Seal with a protective topcoat for durability.
Introduce subtle textures or metallic paints inside the coffers for added depth. Use lighting strategically; recessed or directional lights can highlight the geometric pattern. Keep the surrounding decor minimal to let the ceiling stand out, or add a few personal art pieces that complement the sleek design. The goal is to achieve harmony and modern elegance.
To add architectural interest and a sense of craftsmanship, incorporating paneling between the coffers can create a layered, textured ceiling that feels bespoke. This is a perfect way to add depth and complexity to the design without overwhelming the space.
Imagine a ceiling with rectangular panels framed by moldings inside each coffer, creating a grid of inset panels. This paneling adds dimension, making the ceiling appear higher and more intricate. The interplay of light and shadow across the panels emphasizes their depth and craftsmanship, giving your ceiling a custom, high-end architectural feature.
You can choose from flat, raised, or textured panels depending on your style—smooth for a modern look, or ornate for a traditional one. The panels can be painted or stained to either match or contrast with the moldings for visual interest. Incorporate decorative moldings or rosettes at the panel intersections for extra detail. Seasonal accents like fabric inserts or metallic finishes can further personalize the design.
Start by measuring your ceiling and designing your panel layout. Use high-quality MDF or wood panels cut to size. Attach the moldings with adhesive and nails, creating a crisp frame for each panel. Install the panels within the frames, ensuring they are level and secure. Finish with paint, stain, or other decorative finishes. Attention to detail in the joints and finishes is crucial.
Highlight the panels with contrasting colors or metallic accents. Add LED lighting behind the panels or along the moldings to create ambient effects. You can customize the panels with textured finishes or decorative motifs. This approach offers endless possibilities for personal expression and craftsmanship.
For a ceiling that feels three-dimensional without requiring complex construction, painted faux coffers with shadow effects can create an optical illusion that adds depth and intrigue. This clever technique transforms flat ceilings into dynamic, layered surfaces, ideal for those who appreciate visual illusions and creative design.
Envision a ceiling painted with darker shades inside the faux coffers and lighter shades on the “moldings,” creating the illusion of recessed panels. The shadow effects can be enhanced with strategic shading and highlighting, making the panels appear to pop or recede as desired. This technique provides a sense of architectural grandeur with minimal structural work, making the room feel more spacious and sophisticated.
You can use contrasting colors for maximum impact or monochrome shades for a more subtle depth. Incorporate metallic or gloss finishes inside the coffers to catch the light and add to the realism. Seasonal decor, such as textured fabrics or layered lighting, can enhance the illusion. This technique is suitable for modern, transitional, or even vintage styles.
Start by sketching your faux coffer pattern and selecting the appropriate paints. Carefully tape off the “moldings” and “panels” to create sharp edges. Use a combination of darker and lighter shades, applying them with brushes and sponges for a blended effect. Precision in shading is key to a convincing illusion. This project requires artistic skill, but the result can be a stunning and unique ceiling.
A coffered ceiling is a powerful and elegant architectural feature that can profoundly transform a room, even those with standard 8-foot ceilings. By using appropriate design techniques—such as crisp white moldings to create an illusion of height, soft gray or contrasting dark colors for depth, or the incorporation of materials like faux wood and metallic accents for texture and luxury—you can achieve a high-end, bespoke look.
Whether you favor the timeless simplicity of a classic white grid, the rustic charm of faux wood beams, the modern edge of geometric patterns, or the intricate detail of decorative paneling, the ideas presented in this article demonstrate that a lower ceiling is no barrier to sophistication and grandeur. By carefully planning your grid, choosing complementary colors and finishes, and utilizing strategic lighting, you can craft a stunning focal point that adds significant character and value to your home. The key is to select a style that not only elevates the ceiling but also harmonizes perfectly with your overall interior décor.
Let’s Build
Contact us todayGet daily tips and tricks for making your best home.
2025 Green to Gorgeous